Adult reconstruction · a bone-stock-driven strategy through the medial parapatellar approach
- A failed patellar component is revised for aseptic loosening, polyethylene wear with metallosis or synovitis, patellar fracture, component malposition causing maltracking, or a painful patella left unresurfaced at primary TKR.
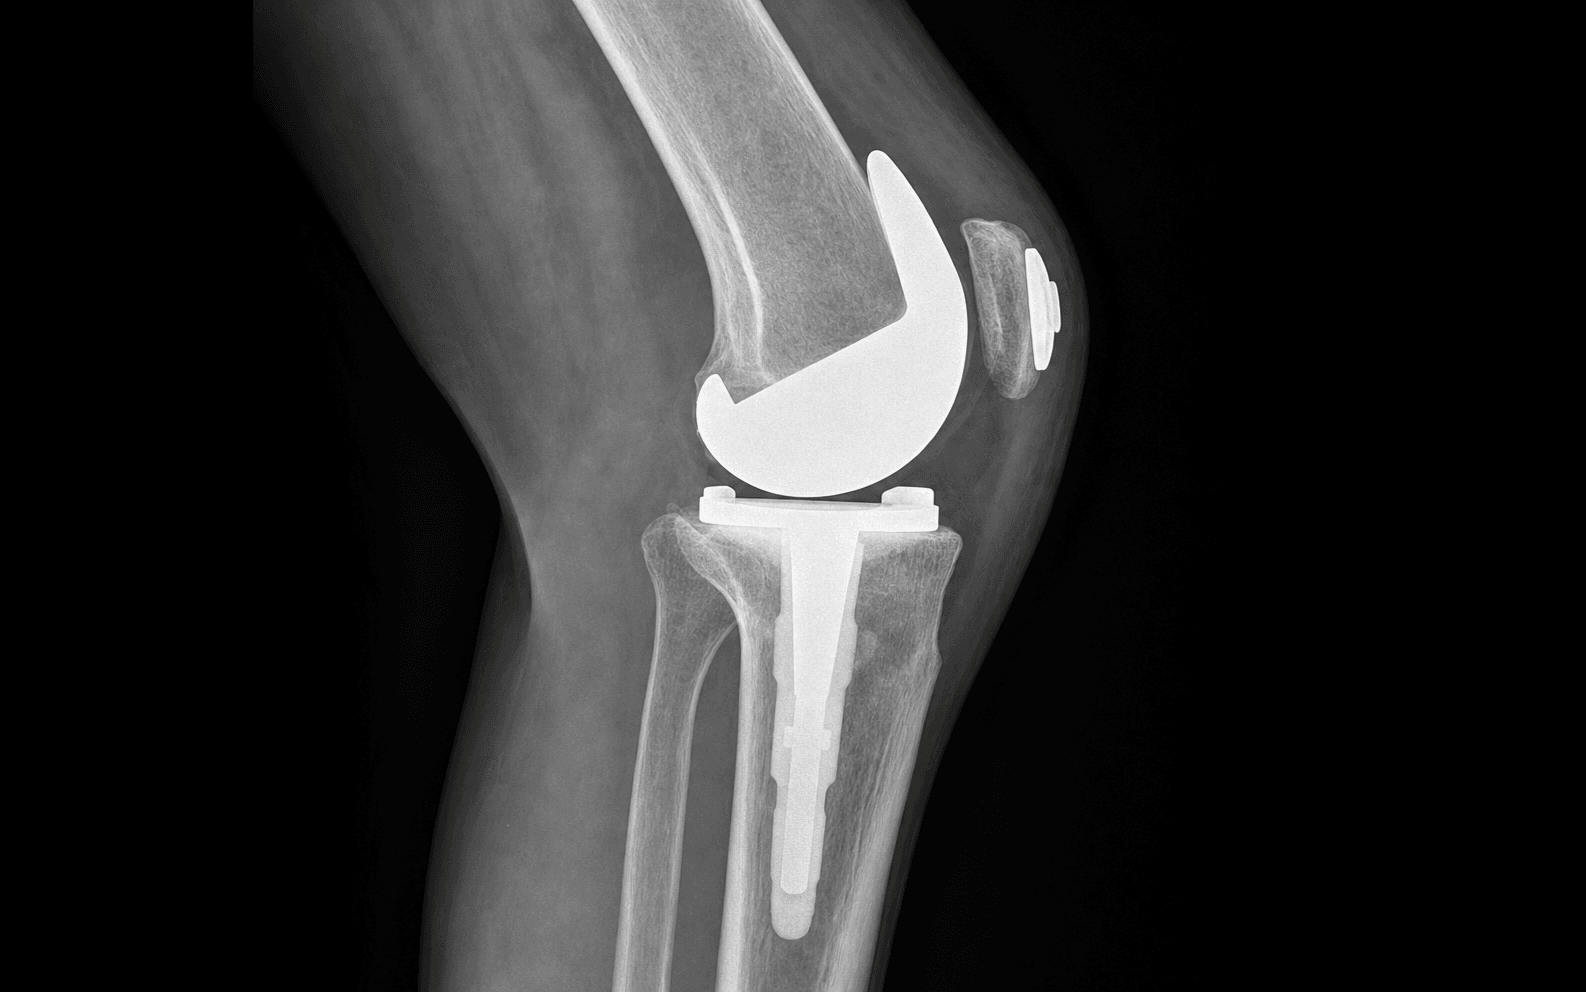
- The whole operation is governed by patellar bone stock, measured from the anterior cortex to the prepared articular surface: at least 10mm allows a standard revision button, 5 to 10mm forces a thin button, trabecular-metal augment or patelloplasty, and less than 5mm leaves patelloplasty, allograft or patellectomy. Always measure with calipers and document.
- Composite thickness rule: remaining bone plus component should equal the native patellar thickness (24 to 26mm) within plus or minus 2mm. Overstuffing by more than 2mm stiffens the knee and risks fracture; thinning by more than 2mm creates a patella baja effect.
- Patellar tracking is judged with the no-thumb test: the patella should centre in the trochlea by about 30 degrees and track centrally through flexion. Maltracking is most often femoral component internal rotation, not the patellar component itself.
- Eversion of the patella in a stiff or osteopenic knee risks fracture and patellar tendon avulsion — flex to 90 to 110 degrees and work on the patella in situ when eversion is dangerous.
When & Why
Indications. Revision of the patellar component is considered for:
- Symptomatic patellar component loosening with adequate remaining bone stock
- Polyethylene wear with metallosis or synovitis
- Patellar fracture associated with component loosening or displacement
- Component malposition causing maltracking
- Secondary resurfacing of a painful patella left unresurfaced at primary TKR
- A failed metal-backed patellar component The one decision that matters — bone stock drives everything. Before committing, confirm the pain is genuinely patellofemoral (not referred from the hip or spine), exclude infection with baseline CRP and ESR (and aspiration if there is any doubt), and verify the femoral and tibial components are stable and well-positioned. Isolated patellar work is appropriate only when the rest of the construct is sound. The operative strategy then follows the measured bone stock:
Adequate stock for a standard all-polyethylene revision dome (8 to 12mm). The default whenever the bone allows.
Compromised stock — a thin revision button, a trabecular-metal augment, morsellised bone graft, or a patelloplasty (denude and contour, no component).
Deficient stock — patelloplasty, patellar allograft reconstruction, or patellectomy as a last resort (it sacrifices extensor power).
Exposure options. The standard route is a medial parapatellar arthrotomy through the previous incision (use the most lateral of several scars to protect the lateral skin blood supply). When exposure is difficult in a stiff knee, extend with a quadriceps snip (a 45-degree cut into the quadriceps tendon — improves access for a modest extensor penalty); reserve V-Y quadricepsplasty for severe stiffness (greater exposure but it weakens the extensor mechanism); and use a tibial tubercle osteotomy when the widest exposure is needed or a concurrent tibial revision is planned, as it preserves the extensor mechanism. Consent specifically for patellar fracture, extensor mechanism injury (quadriceps or patellar tendon), the small risk of needing patelloplasty or patellectomy if bone stock is worse than expected, persistent anterior knee pain, and the higher infection risk of revision surgery. Setup. Supine on a radiolucent table with a leg holder or thigh bump, upper-thigh tourniquet, regional or general anaesthesia. Review the skyline and lateral radiographs (and a CT if patellar thickness is uncertain), note the previous implant type (metal-backed versus all-polyethylene), and have cerclage wire, bone graft and patellectomy options available before starting.
The Operation
The goal: expose the patella through the previous medial parapatellar incision, remove the failed component without fracturing the bone, clear all cement and membrane, measure the residual stock, and then resurface, augment, patelloplasty or patellectomy as the stock dictates — finishing with central, stable patellar tracking. The exposure is laid out as the first steps below.
Operative sequence
- Supine on a radiolucent table, thigh bump or leg holder, upper-thigh tourniquet.
- Use the previous scar — the most lateral of several if multiple are present — to protect the lateral skin blood supply and avoid flap necrosis.
- Develop full-thickness skin flaps carefully (multiple previous incisions risk ischaemia), then perform a medial parapatellar arthrotomy.
- Measure patellar thickness with calipers (anterior cortex to articular surface) and look for fracture lines, osteolysis, component loosening, polyethylene wear and metal-backing failure.
- Mark any visible fracture line with methylene blue so it is not completed during manipulation.
- Assess tracking with the trial or existing components in place as a baseline.
- Flex the knee progressively from 30 to 60 to 90 degrees with gentle lateral pressure to evert the patella; release lateral-gutter adhesions if needed.
- Eversion is dangerous in a stiff, osteopenic knee or a thin patella — instead flex to 90 to 110 degrees and work on the patella in situ, or add a quadriceps snip.
- Document any pre-operative extensor lag, which signals a tenuous extensor mechanism.
- Use thin, flexible osteotomes to disrupt the cement-bone or bone-implant interface, working circumferentially from the most accessible edge.
- For a metal-backed component, remove the shell first, then the polyethylene and cement; for an all-polyethylene cemented button, use an osteotome and gentle mallet or a slap hammer.
- Take your time — rushing fractures the patella. A Gigli saw beneath a well-fixed ingrown component, or ultrasonic cement removal for a tenacious mantle, help; have a patellar cerclage wire ready.
- Clear all cement, the fibrous interface membrane and necrotic bone down to viable bleeding bone with curettes, rongeurs and small osteotomes; prefer hand instruments over a high-speed burr on thin bone.
- Pulsatile lavage removes debris; measure the remaining thickness from anterior cortex to prepared surface in several places, because loss is often asymmetric.
- Send tissue for culture to exclude occult infection.
Measure the prepared patella and follow the bone-stock algorithm:
- Strategy
- Standard revision component
- Typical choice
- All-polyethylene dome or anatomic button (8 to 12mm), cemented
- Strategy
- Conserve bone or augment
- Typical choice
- Thin revision button, trabecular-metal button, morsellised graft, or patelloplasty
- Strategy
- Alternatives to a component
- Typical choice
- Patelloplasty, patellar allograft reconstruction, or patellectomy (last resort)
- With trial femoral and tibial components in place, assess tracking through the range: the patella should centre in the trochlear groove by about 30 degrees and track centrally through flexion.
- Perform the no-thumb test — reduce the patella without manual pressure and flex the knee; it should stay centred.
- Lateral tilt or subluxation points to femoral internal rotation, an oversized femoral component, lateral retinacular tightness or trochlear dysplasia — correct the cause before adding a lateral release.
- Cut a flat surface parallel to the anterior cortex, resecting the minimum needed (typically 2 to 3mm more than primary) to seat the button.
- Drill peg holes perpendicular to the prepared surface to 8 to 12mm depth, matching the component design (a central dome with peripheral pegs reduces stress concentration versus all-peripheral pegs); leave at least 5mm of bone between the hole floor and the articular surface.
- Pulsatile-lavage and dry the bone thoroughly, then cement an antibiotic-loaded all-polyethylene button with a thin (1 to 2mm) mantle under sustained clamp pressure until polymerised, matched to the trochlear groove; remove excess cement before it sets.
- When stock is 5 to 10mm and a component is not safe, denude the remaining cartilage and fibrous tissue and contour the patella with rongeurs, curettes and a burr to match the trochlea, preserving the anterior cortex.
- Expect moderate pain improvement (about 60 to 70 percent satisfaction) — inferior to successful resurfacing but far better than patellectomy — and counsel the patient about residual anterior knee pain and crepitus.
- Tracking still must be central; a smooth patella that maltracks will still hurt.
- If the patella fractures, assess the pattern. A transverse fracture with two equal fragments is the most favourable: fix with a tension band (two parallel 1.6mm K-wires and a figure-of-8 18-gauge cerclage wire), burying the K-wire ends subcortically to prevent migration.
- A non-displaced vertical fracture is often stable with component fixation alone; a comminuted fracture may need partial or total patellectomy.
- A revision component can still be seated if the combined bone stock of both fragments is at least 10mm, with pegs placed off the fracture line where possible.
- With all components in, re-check tracking from extension to maximum flexion — central throughout, no tilt, no patellar clunk — and confirm 0 degrees extension and 110 to 130 degrees flexion without restriction.
- Lavage thoroughly (6 to 9L pulsatile) to remove cement and bone debris; achieve meticulous haemostasis (inspect the lateral gutter if a lateral release was done) and consider a drain and tranexamic acid.
- Close the arthrotomy in 30 to 40 degrees of flexion with interrupted absorbable sutures so the repair is not under tension, then close in layers over a compression dressing.
The patellar tendon (avulsion from the tibial tubercle or inferior pole during eversion in a stiff knee), the quadriceps tendon (rupture with forced flexion) and the patellar bone itself are the structures at risk. Evert gently, never force flexion, work in situ when the patella is thin or osteopenic, and have cerclage wire and a fracture-fixation set ready before you begin removing the component.
A native patella is 24 to 26mm thick; after primary TKR it typically measures 14 to 18mm. Aim for a composite (remaining bone plus component) within plus or minus 2mm of the native thickness. Thickening by more than 2mm overstuffies the joint (pain, limited flexion, raised contact stress, fracture); thinning by more than 2mm produces a patella baja effect. Measure with calipers before and after resection and record it.
Lateral retinacular release is needed in only 10 to 20 percent of revisions. Prefer correct femoral rotation and sizing first. When required, an inside-out technique (dividing the retinaculum under direct vision from within the joint) protects the lateral superior genicular artery; over-release causes medial subluxation and instability, and combining a medial arthrotomy with a full lateral release devascularises the patella and risks osteonecrosis.
Aftercare & Complications
Rehabilitation | Phase | Timing | Weight-bearing and motion | Key points | |-------|--------|---------------------------|------------| | 1 | 0 to 2 weeks | WBAT with frame or crutches; CPM 0 to 60 degrees, advancing to 0 to 90 | Quadriceps sets and ankle pumps from day 1; wound check day 3 | | 2 | 2 to 6 weeks | Full weight-bearing; ROM toward 110 degrees | Scar care and quadriceps strengthening; drain out by 24 to 48h | | 3 | 6 to 12 weeks | Full activity, building strength | Outpatient radiographs (AP, lateral, skyline) at 6 weeks | | 4 | 3 to 12 months | Unrestricted | Radiographs at 1 year; monitor anterior knee pain and crepitus | If an intra-operative fracture was fixed or the bone stock was poor, protect with a brace locked in extension for 6 weeks and limit ROM (0 to 60 degrees for weeks 2 to 6), advancing only after radiographic healing. Tranexamic acid (1g at induction, 1g at closure) reduces blood loss by about 30 to 40 percent; chemical thromboprophylaxis (LMWH or DOAC) continues for 35 days. Complications
- Recognition
- Intra-op: fracture during manipulation. Post-op: sudden pain, loss of active extension, palpable defect
- Prevention
- Gentle handling, avoid forced eversion, assess stock, sound technique
- Management
- Intra-op transverse: tension band. Vertical non-displaced: observe. Comminuted: patellectomy. Post-op unstable: ORIF
- Recognition
- Anterior knee pain worse on stairs or rising; radiographic lucency greater than 2mm or progressive
- Prevention
- Adequate preparation, cement technique, correct sizing and tracking
- Management
- Revise if stock adequate; patelloplasty if compromised; address the mechanical cause
- Recognition
- Multifactorial — malposition, malrotation, overstuffing, referred pain
- Prevention
- Optimal positioning, correct composite thickness, central tracking
- Management
- Conservative first (physiotherapy, injections); revise only for a clear mechanical cause
- Recognition
- Fibrous nodule catching on the femoral box at 30 to 45 degrees; MRI confirms
- Prevention
- Correct femoral sizing, avoid excess notch resection, optimise tracking
- Management
- Quadriceps stretching and NSAIDs; arthroscopic or open nodule excision with notchplasty if persistent
- Recognition
- Quadriceps or patellar tendon rupture — unable to extend, palpable gap, extensor lag
- Prevention
- Avoid excess tension during eversion, protect the tendon, gentle handling
- Management
- Primary repair with transosseous sutures and augmentation; allograft if chronic; 6 to 12 weeks protected
- Recognition
- Acute: drainage, erythema, fever. Chronic: persistent pain, loosening; raised CRP and ESR
- Prevention
- Antibiotic prophylaxis, laminar flow, asepsis, minimise operative time
- Management
- Acute (less than 3 weeks): DAIR. Chronic: explant and debride, or two-stage revision
- Recognition
- Persistent pain despite apparent success; fragmentation and sclerosis on radiograph
- Prevention
- Preserve blood supply, avoid circumferential release, thin cement mantle
- Management
- Conservative if stable; patellectomy if collapse; allograft in the young symptomatic patient
Viva & Exam Focus
Protect five structures: the patellar tendon (avulsion during eversion), the quadriceps tendon (rupture with forced flexion), the patellar bone stock (at least 10mm to resurface safely), the lateral superior genicular artery (injured during lateral release and a major contributor to patellar blood supply), and the anterior femoral cortex (notching creates a stress riser and a fracture risk).
STOCKSTOCK — patellar bone-stock assessment
TRACKTRACK — patellar maltracking causes and assessment
Clinical Decision Scenarios
Practise clinical reasoning and management decisions out loud
“A 68-year-old woman presents 8 years after a primary TKA with progressive anterior knee pain, worse on stairs. Her patella was not resurfaced at the primary. The skyline view shows mild lateral tilt and 12mm of patellar bone. What is your approach?”
“While removing a loose cemented patellar component you sustain a transverse fracture through the mid-patella, with two roughly equal fragments. How do you proceed?”
“A 72-year-old diabetic man has persistent anterior knee pain 4 years after a revision TKA with patellar resurfacing. The patellar component is well-fixed, tracking is central on the skyline, and CRP and ESR are normal. What are the causes and your management?”
Indications
- Loosening with adequate stock, polyethylene wear with metallosis, fracture, malposition, painful unresurfaced patella
- Confirm pain is patellofemoral and exclude infection first
Bone-stock algorithm
- At least 10mm: standard revision button
- 5 to 10mm: thin button, trabecular-metal augment, graft or patelloplasty
- Less than 5mm: patelloplasty, allograft or patellectomy
Composite thickness
- Bone plus component equals native 24 to 26mm, within plus or minus 2mm
- Overstuffing more than 2mm: pain, stiffness, fracture risk
- Measure with calipers before and after resection
Tracking — no-thumb test
- Patella centres by about 30 degrees without manual pressure
- Maltracking usually means femoral internal rotation
- Lateral release only as a last resort
Danger structures
- Patellar and quadriceps tendons during eversion or forced flexion
- Patellar bone stock (minimum 10mm)
- Lateral superior genicular artery in lateral release
- Anterior femoral cortex — notching is a stress riser
Intra-operative fracture
- Transverse: tension band (two K-wires plus figure-of-8 wire), then component if stock allows
- Vertical non-displaced: observe or component alone
- Comminuted: reconstruction or patellectomy; brace in extension 6 weeks
Background & Evidence
The resurfacing debate. Whether to resurface the patella at primary TKR remains contested. The pooled randomised evidence — Chen and colleagues' 2013 meta-analysis (14 trials, 1725 knees) and the updated 2021 meta-analysis (32 trials, 6887 knees) — shows resurfacing lowers the reoperation rate and patellofemoral crepitus and modestly improves Knee Society and function scores, with no significant difference in anterior knee pain, range of motion or patient satisfaction. The 2013 data quantified an absolute reoperation reduction of about 4 percent (a number needed to treat of 25). The practical implication for revision is that a painful unresurfaced patella with good bone stock and sound tracking is a reasonable indication for secondary resurfacing, but resurfacing for pain alone should be counselled cautiously. Registry evidence. The large arthroplasty registries (NJR, AOANJRR, NZJR) consistently report modestly lower cumulative revision for resurfaced or routinely-resurfacing practice than for leaving the patella unresurfaced, and markedly higher revision for metal-backed patellar components — which have been largely abandoned in favour of all-polyethylene designs. Practice varies by region between routine, selective and never-resurface strategies, reflecting surgeon training and implant design more than a single global standard; exact percentages differ by registry, year and case-mix, so quote them as trends rather than fixed numbers. Pathoanatomy of patellar maltracking. When tracking is abnormal the patellar component is rarely the primary culprit. Berger and colleagues showed on CT that patellofemoral complications correlate with excessive combined (femoral plus tibial) internal component rotation: small internal rotation (1 to 4 degrees) causes tilt and lateral tracking, moderate (3 to 8 degrees) causes subluxation, and large (7 to 17 degrees) causes dislocation or late failure. The lesson — before blaming or revising the patella, image and correct femoral (and tibial) rotation, which may mandate femoral rather than patellar revision.
References
Malrotation causing patellofemoral complications after total knee arthroplasty
- 30 knees with isolated patellofemoral complications versus 20 well-functioning controls, with rotation measured on CT against the epicondylar axis and tibial tubercle
- Patellofemoral complications correlated directly with excessive combined (femoral plus tibial) internal component rotation, while controls sat in combined external rotation
- Small internal rotation (1 to 4 degrees) caused tilt or lateral tracking, moderate (3 to 8 degrees) caused subluxation, and large (7 to 17 degrees) caused dislocation or late component failure
Isolated patellar component revision of total knee arthroplasty
- 42 knees undergoing isolated patellar component revision (mainly loosening and metal-backed wear or dissociation), followed 2 to 8 years
- Hospital for Special Surgery score improved only modestly from 71 to 81, with excellent or good results in only 30 of 36 evaluated knees
- High complication rate: late patellar fracture in 5, instability in 3, peroneal palsy in 2, recurrent wear in 2, infection in 1
Patellar resurfacing versus nonresurfacing in total knee arthroplasty: a meta-analysis of randomised controlled trials
- 14 randomised trials, 1725 knees pooled
- Resurfacing reduced absolute reoperation risk by 4 percent (95 percent CI 2 to 6), giving a number-needed-to-treat of 25 to prevent one reoperation
- No significant difference in anterior knee pain or knee pain scores between resurfaced and unresurfaced groups
Patellar resurfacing versus nonresurfacing in total knee arthroplasty: an updated meta-analysis of randomized controlled trials
- 32 randomised trials, 6887 knees — the largest pooled dataset to date
- Resurfacing significantly reduced reoperation (overall and at 5 years or more) and patellofemoral noise, and improved Knee Society and function scores
- No significant difference in anterior knee pain, range of motion, Oxford, KOOS or VAS scores, patellar tilt, or patient satisfaction
National joint registry evidence on patellar resurfacing (NJR, AOANJRR, NZJR)
- Large registries consistently report modestly lower cumulative revision for resurfaced (or routinely resurfacing) practice compared with leaving the patella unresurfaced
- Metal-backed patellar components show markedly higher revision and have been largely abandoned in favour of all-polyethylene designs
- Practice varies by region between routine, selective, and never-resurface strategies, reflecting surgeon training and implant design rather than a single global standard
Patellar resurfacing or retention in total knee arthroplasty — a prospective bilateral study
A frequently cited prospective study of patients with bilateral TKAs (one side resurfaced, one not), used to inform the selective-resurfacing debate.
The patellofemoral component of total knee arthroplasty
A foundational review of the patellofemoral considerations in total knee arthroplasty.
Patellar component resurfacing (Surgery of the Knee, chapter)
A reference textbook chapter on the technique of patellar component resurfacing.
Patellar complications in total knee arthroplasty (The Adult Knee, chapter)
A reference textbook chapter on patellar complications after total knee arthroplasty.