Load Sharing | Stress Shielding | Fracture Healing Mechanics
- Wolff's Law: Bone adapts to mechanical stress by remodeling architecture
- Stress shielding occurs when implant bears majority of load, leading to bone resorption
- Working length of construct determines flexibility (longer = more flexible)
- Screws fail by pullout or shear; plates fail by bending or fatigue fracture
- Torsional rigidity proportional to diameter to the 4th power
- “AO principles: Reduction, fixation, preservation of blood supply, early mobilization
- “Locked plating converts screws into fixed-angle device (more like external fixator)
- “Composite beam effect: Plate and bone together stronger than sum of parts
- “Elastic modulus mismatch causes stress concentration at implant-bone interface
Overview and Introduction
Successful fracture fixation depends on the interaction between the implant, the bone and the tissue that heals between them. The construct you choose sets the type of stability, absolute or relative, and the stability sets the way the fracture heals, primary or secondary.
The AO principles. Fracture reduction, anatomic for the articular surface and relative for the diaphysis; rigid fixation appropriate to the fracture pattern; early mobilisation; and preservation of the blood supply by minimising soft-tissue stripping and preserving the periosteum. The four are remembered as FREP.
FREPAO Principles of Fracture Fixation
Hook:FREP your fracture: Follow AO principles for successful fixation!
Two kinds of stability. A construct provides either absolute stability, with no interfragmentary motion and direct bone healing, or relative stability, with controlled micromotion and healing by callus. Compression plating and lag screws give the first; bridge plating and intramedullary nails give the second.
What else governs healing. Beyond the stability of the construct, the fracture heals according to its tissue perfusion, its alignment, and the patient's biology (age, smoking, diabetes and medications). The implant's stiffness matches the phase of healing (dynamic compression), and early motion stimulates healing without disrupting the fixation.
Wolff's Law and Stress Shielding
Wolff's Law. Bone adapts its structure to the mechanical demands placed on it: increased stress stimulates formation, decreased stress leads to resorption. This is the principle behind stress shielding after rigid internal fixation.
Stress shielding. A rigid implant bears the majority of the load and reduces the stress in the underlying bone by 50-80%. The bone remodels to that lower demand with cortical thinning and porosity, which is why there is a risk of refracture once the implant is removed. Two authorities on this page disagree about whether the porosis is mechanical or biological in origin; the argument is set out under Controversies.
What follows from it. Bridge plating is preferred over compression plating in some cases, and locked plates act as internal fixators and shield less. As the fracture heals the bone gradually takes back its share of the load, so delaying removal allows the bone to adapt before the implant stops carrying it.
Interfragmentary Strain Theory (Perren)
Perren's interfragmentary strain theory is the unifying concept linking construct stability to the tissue that can form in the fracture gap, and examiners expect it.
Strain at the fracture is the relative change in gap width under load: the interfragmentary movement divided by the original gap width. A tissue can only form and survive in the gap if the local strain stays below the strain tolerance of that tissue.
- Approx. strain tolerated
- Under about 2%
- Implication
- Forms only in a very stable gap — the basis of direct/primary healing
- Approx. strain tolerated
- Up to roughly 10%
- Implication
- Forms with the controlled micromotion of relative stability
- Approx. strain tolerated
- Up to about 100%
- Implication
- Tolerates large motion; persists as fibrous nonunion if motion never falls
A gap that is too small can paradoxically fail to heal. With a tiny gap, even a small absolute movement produces a very high percentage strain that exceeds bone's tolerance, so an imperfectly stable simple fracture with a hairline gap can progress to nonunion. The answer is either true absolute stability, compressing the gap towards zero motion, or deliberate relative stability with a larger effective gap. "Almost stable" is the recipe for nonunion.
Comminution helps healing. Spreading the same total motion across many fracture lines means each individual gap sees only a fraction of the strain. This is why multifragmentary fractures bridged with a flexible construct heal readily by callus, whereas a single transverse gap is far less forgiving.
Load Sharing vs Load Bearing
Load sharing. The implant and the bone both transmit load across the fracture, so the bone contributes to mechanical stability. Bridge plating of a simple fracture and intramedullary nailing with cortical contact are load-sharing constructs.
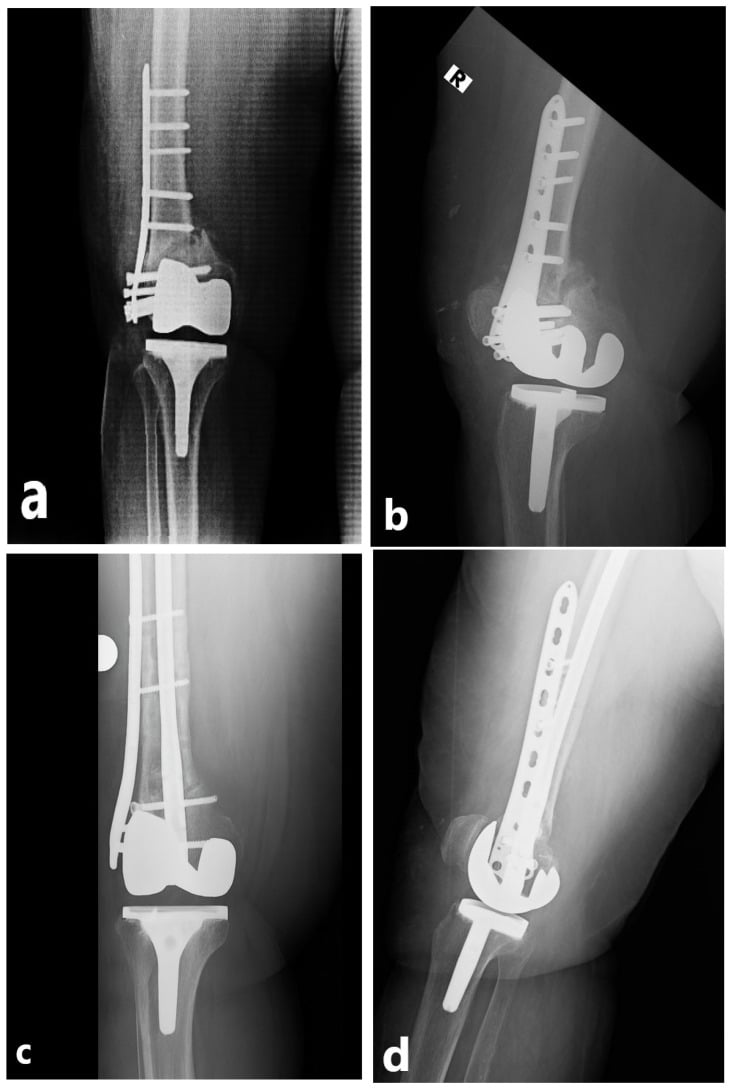
Load bearing. The implant carries all or most of the load because the bone contributes minimally, whether from comminution, bone loss or nonunion. Locked plating of a segmental defect, arthroplasty and massive allografts are load-bearing constructs. Which of the two you are building determines the implant you select.
- Load Sharing
- Significant (50%+)
- Load Bearing
- Minimal (under 20%)
- Clinical Example
- Simple vs comminuted fracture
- Load Sharing
- Lower, distributed
- Load Bearing
- Higher, concentrated
- Clinical Example
- Bridge plate vs locking plate with gap
- Load Sharing
- Bone failure more likely
- Load Bearing
- Implant fatigue fracture risk
- Clinical Example
- Refracture vs plate breakage
- Load Sharing
- Callus formation essential
- Load Bearing
- Biological healing may not occur
- Clinical Example
- Hypertrophic vs atrophic non-union
Load-bearing constructs require stronger implants and carry higher failure risk. If bone cannot contribute (segmental defect, severe comminution, infection with bone loss), consider stronger constructs (double plating, reconstruction nail, arthroplasty) or biological augmentation (bone graft, BMP).
Working Length and Construct Stiffness
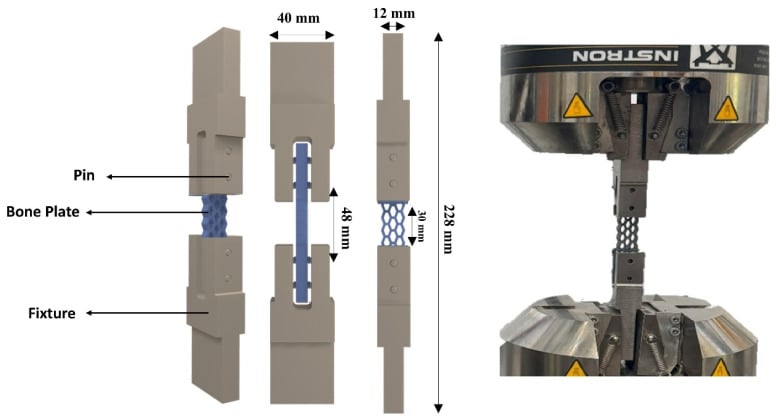
Working length is the distance between the nearest screws on either side of the fracture, and it determines the flexibility of the construct. A short working length gives a rigid construct with less callus formation and higher implant stress. A long working length gives a flexible construct with more callus and load distribution, and in exchange raises the implant stress, as the plate bends across the longer span, and the strain at the fracture.
Choosing a short working length. Articular fractures that need an anatomic reduction, metaphyseal fractures with good bone quality, and fractures where callus is undesirable. It buys maximum stability and minimal motion at the cost of stress shielding, higher implant stress and less biological stimulus.
Choosing a long working length. Diaphyseal fractures amenable to relative stability, osteoporotic bone that needs its load distributed, and fractures where callus is wanted. It buys load distribution and biological healing at the cost of more motion at the fracture and the potential for delayed union if the construct is too flexible.
The cube law. Stiffness is inversely proportional to working length cubed, so doubling the working length reduces stiffness 8-fold. Implant diameter has its own power laws: doubling the diameter increases bending strength roughly 8-fold, because section modulus is proportional to diameter cubed, and bending and torsional rigidity roughly 16-fold, because the area and polar moments of inertia are proportional to diameter to the fourth power.
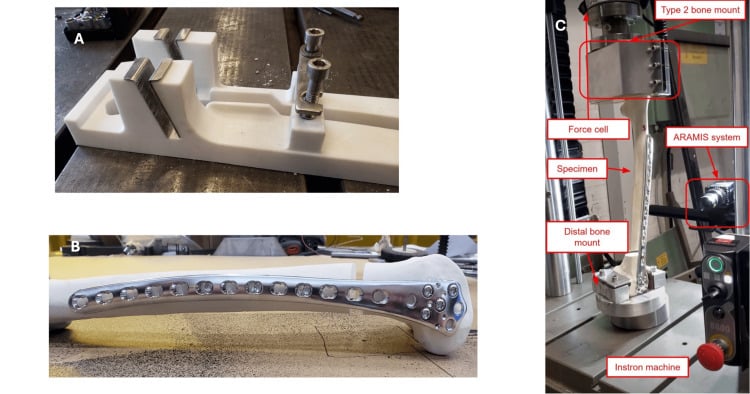
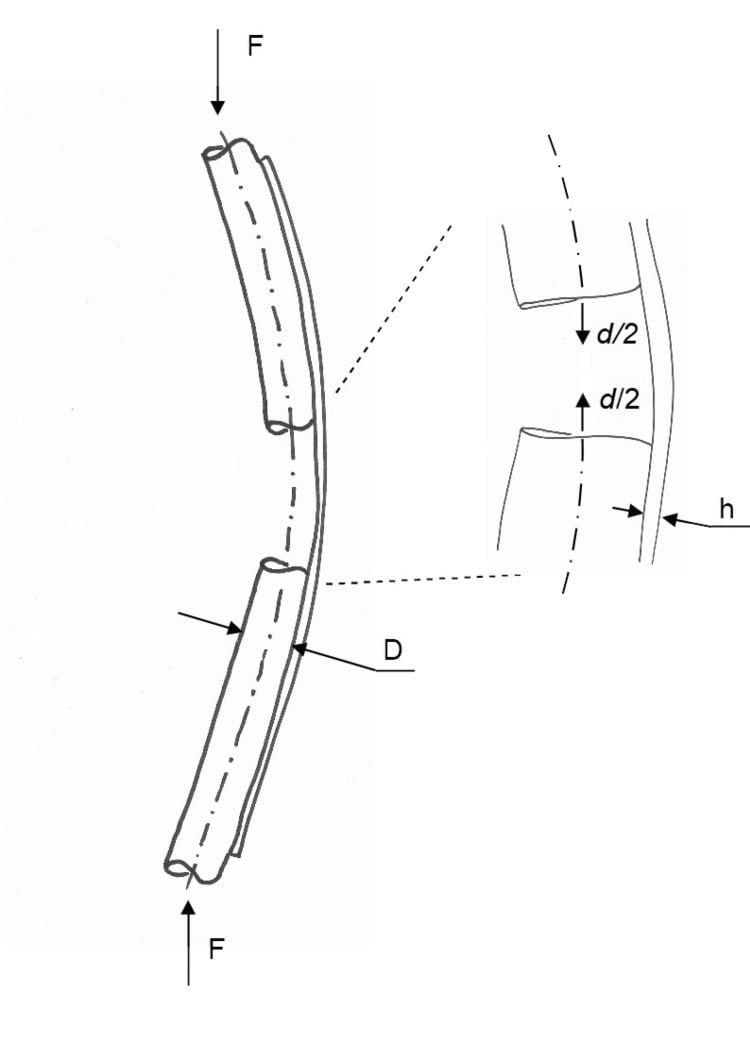
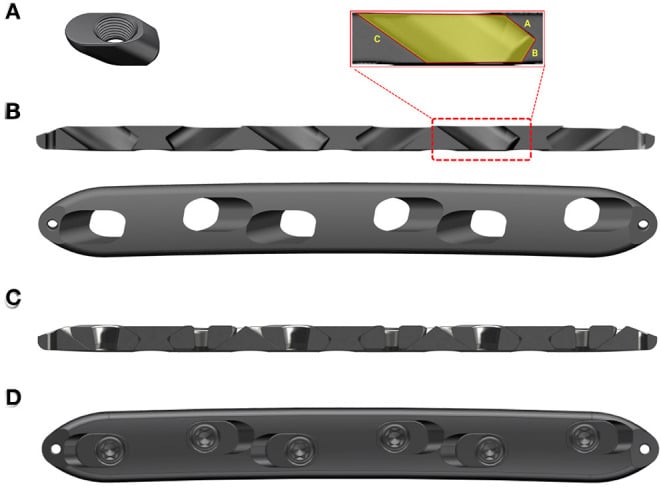
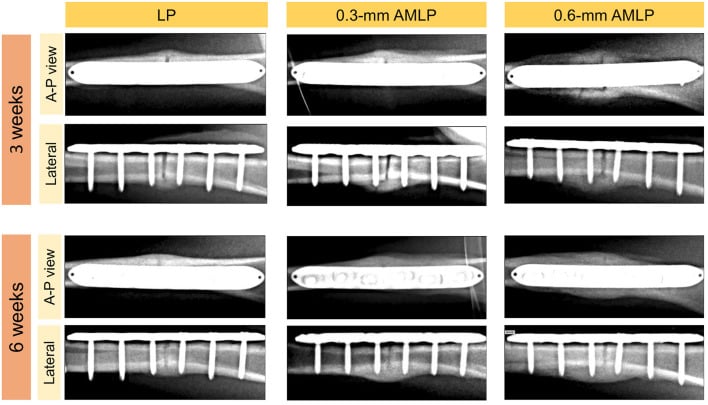
Engineering the stiffness. Construct mechanics can be designed rather than simply made more rigid. An axial-micromotion locking plate keeps the fixed-angle locking of its screws while allowing a defined amount of axial motion, separating desirable axial micromotion from excessive shear.
Screw Biomechanics
Pullout strength. A screw holds by the bone engaged between its threads, and its pullout strength is proportional to that thread engagement: deeper threads give more surface area and a larger outer diameter engages more bone. Cortical bone provides the majority of the holding power, and bicortical screws are 2-3 times stronger than unicortical fixation. Osteoporotic bone has 50-70% lower pullout strength. Stripping torque defines the maximum tightness a screw can be given.
- Mechanism
- Fine threads, cut own path
- Advantage
- Maximum holding in cortical bone
- Disadvantage
- Poor purchase in cancellous bone
- Mechanism
- Coarse threads, self-tapping
- Advantage
- Good purchase in metaphyseal bone
- Disadvantage
- Weaker in pure cortical bone
- Mechanism
- Threads engage plate, fixed angle
- Advantage
- No compression on bone, unicortical OK
- Disadvantage
- Cannot compress fracture, more expensive
- Mechanism
- Gliding hole, compression across fracture
- Advantage
- Absolute stability, interfragmentary compression
- Disadvantage
- Requires precise technique, can overdistract
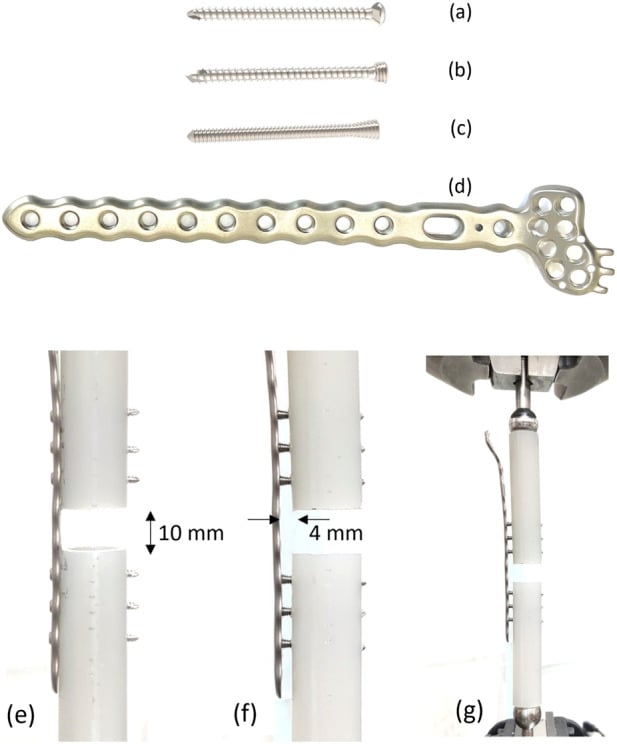
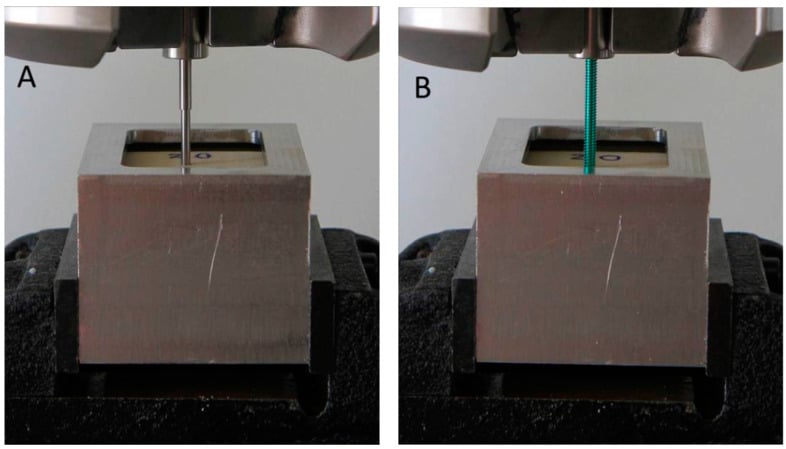
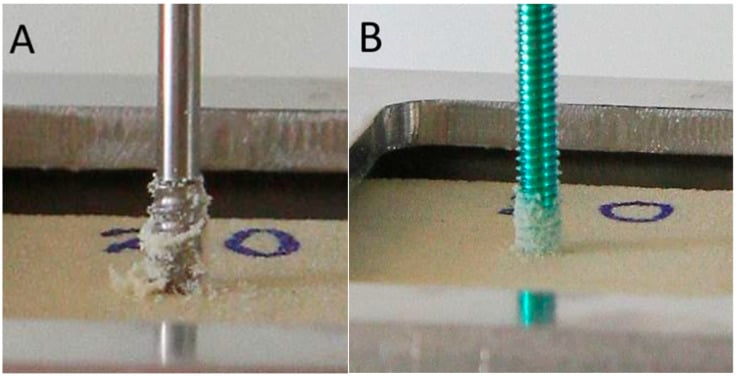
How screws fail. Under a transverse (shear) force the highest stress is at the bone-implant interface. Tension along the screw axis is resisted by the threads and fails by pullout, with the threads stripping when purchase is inadequate or the tension excessive. Torsional failure occurs during insertion or with loosening, and the bone-screw interface itself fails in osteoporosis or when the screw is over-torqued. Modulus mismatch between screw and bone concentrates stress at the interface, and particulate wear debris leads to osteolysis around the screw.
The Tension Band Principle
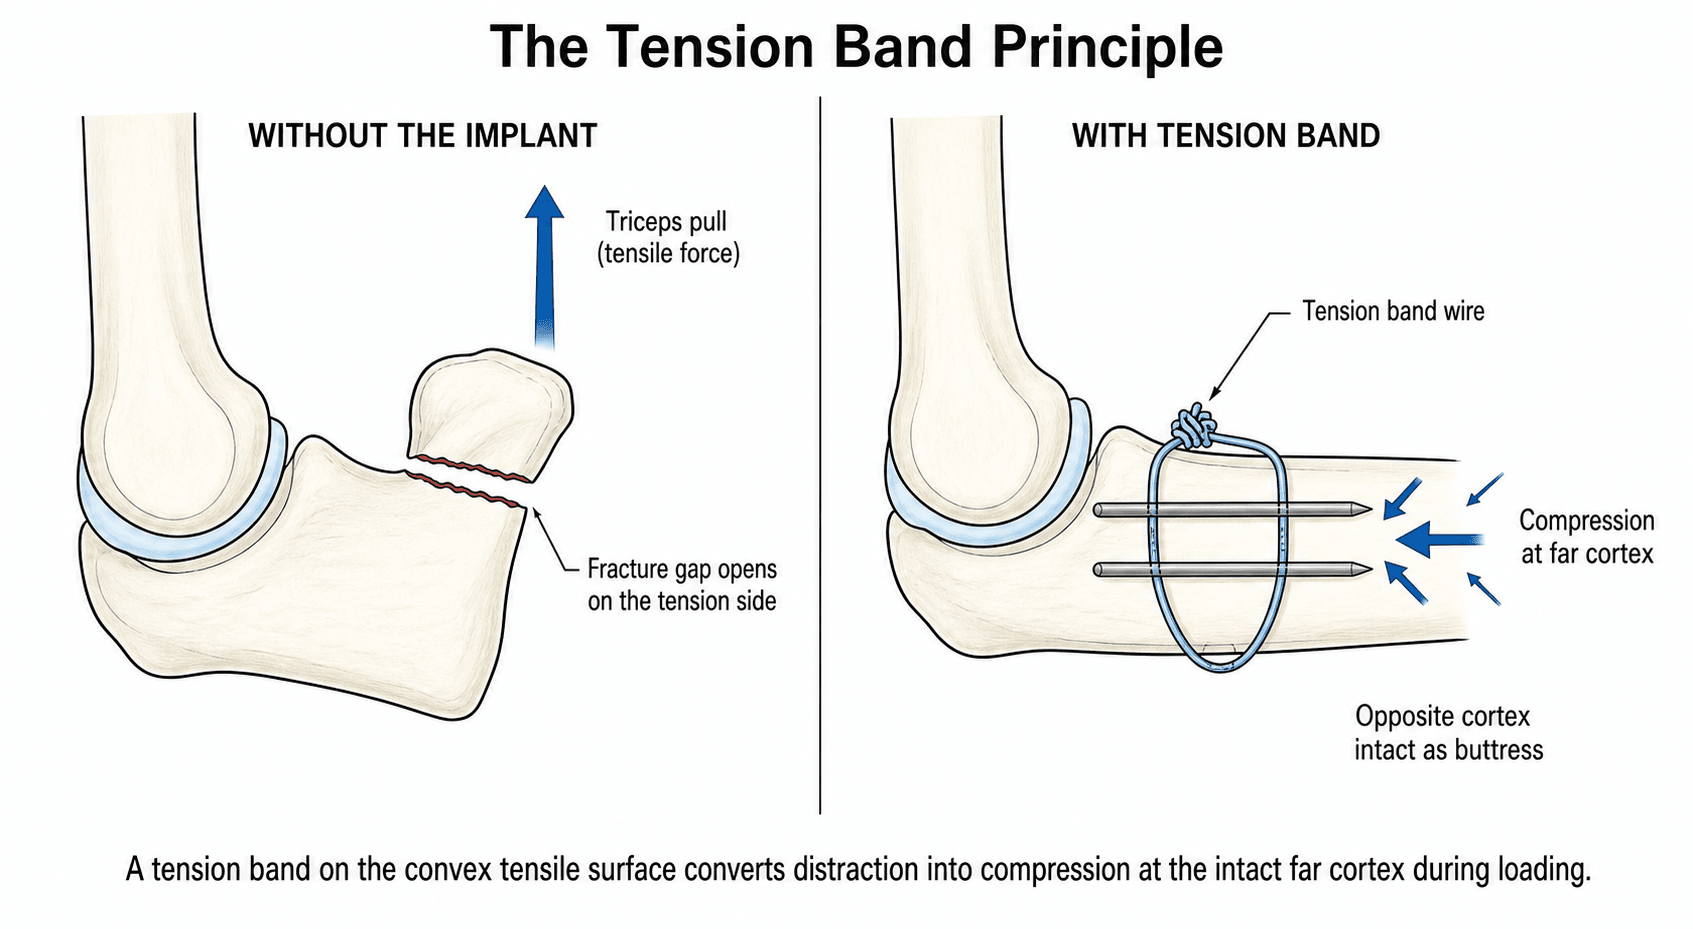
The tension band principle converts the tensile (distraction) force on the convex side of an eccentrically loaded bone into compression at the far cortex. An implant (wire, plate or band) placed on the tension side resists distraction; as the bone is loaded, the fragments are driven together on the opposite cortex.
What it needs to work. Three conditions:
- The implant must lie on the tension (convex) side of the bone.
- There must be an intact cortex opposite the implant to act as a buttress for the compression. If the far cortex is comminuted or deficient the construct sees bending instead and the tension band fails; that situation needs a buttress or a load-bearing construct.
- The bone must be loaded dynamically, typically by active muscle pull, to generate the repeated compressive cycle.
Where it is used. The classic examples:
- Olecranon and patella fractures: the triceps or quadriceps pull is the deforming tensile force, and a tension band (K-wires plus a figure-of-eight wire) converts it into articular compression with elbow or knee flexion.
- Greater trochanter and medial malleolus avulsions, driven by abductor and deltoid-ligament pull respectively.
- A plate placed on the tension side of a loaded long bone (the lateral femur, for example) acts as a tension band for the same reason, which is why plate position relative to the tension surface matters.
Implant Materials and Stiffness
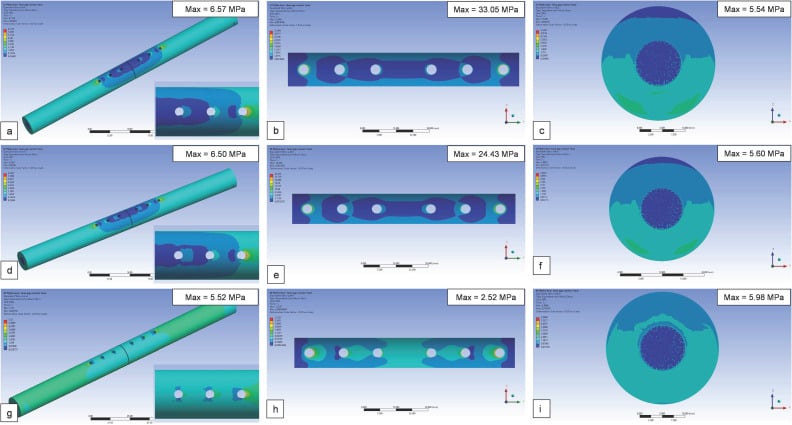
Modulus. The elastic (Young's) modulus of an implant determines how much load it carries relative to bone. A stiffer implant shields the bone from stress; a more compliant implant transfers more load to the healing bone. The mismatch between the modulus of the implant and that of bone creates a stress concentration at the implant-bone interface, particularly at screw holes, and this can lead to peri-implant fractures.
Fatigue. Fatigue strength governs how many loading cycles an implant survives before failure, a key consideration in load-bearing constructs spanning a fracture gap.
- Elastic Modulus (GPa)
- 15-20
- Key Property
- Reference value
- Biomechanical Implication
- Implants are far stiffer, driving stress shielding
- Elastic Modulus (GPa)
- 0.1-2
- Key Property
- Highly variable with BMD
- Biomechanical Implication
- Poor screw purchase in metaphysis when osteoporotic
- Elastic Modulus (GPa)
- ~110
- Key Property
- Lower modulus, biocompatible, MRI-friendly
- Biomechanical Implication
- Less stiff than steel, lower stress shielding, notch-sensitive
- Elastic Modulus (GPa)
- ~200-210
- Key Property
- High stiffness and ductility
- Biomechanical Implication
- Stiffer construct, more stress shielding, allows contouring
- Elastic Modulus (GPa)
- ~210-240
- Key Property
- High wear and fatigue resistance
- Biomechanical Implication
- Very stiff; used for bearing surfaces and stems
The order of stiffness is cobalt-chrome greater than stainless steel greater than titanium greater than cortical bone. The larger the mismatch, the greater the stress concentration where implant meets bone (the last screw hole, for example) and the more stress shielding under the plate.
Clinical Relevance and Applications
The fracture pattern chooses the construct. Match the stiffness of the implant to the personality of the fracture:
- Simple fractures: absolute stability with compression plating or lag screws
- Comminuted fractures: relative stability with bridge plating or nailing
- Articular fractures: anatomic reduction and absolute stability
Selecting the implant. Use a longer working length for comminuted patterns, which makes the construct more flexible; bicortical screws for maximum pullout strength; and remember that locked plates act as internal external fixators.
Avoiding the complications. To limit stress shielding, use less rigid constructs when possible. To avoid implant failure, ensure adequate working length and screw density. After implant removal, load gradually and delay high-impact activities because of the refracture risk.
Guidelines, Registries & Global Practice
Global Epidemiology
- Fractures requiring fixation are among the commonest procedures in orthopaedics worldwide; the global incidence of fragility fractures is rising sharply with population ageing, increasingly shifting fixation challenges into osteoporotic bone.
- Implant-related complications (loss of fixation, nonunion, peri-implant fracture, fatigue failure) are a leading reason for unplanned reoperation after fracture surgery globally.
- Osteoporosis disproportionately affects fixation in older adults and in low- and middle-income settings where bone-protection therapy and implant choice may be limited.
Side-by-Side Guideline Frameworks
- Core Position
- Anatomical reduction, stable fixation matched to pattern, blood-supply preservation, early motion
- Practical Emphasis
- Absolute vs relative stability framework; biological internal fixation
- Core Position
- Standards for open fractures and fragility-fracture care emphasising soft tissues and timely definitive fixation
- Practical Emphasis
- Construct that permits early weight-bearing in the elderly
- Core Position
- Evidence-based clinical practice guidelines (e.g. hip fracture) supporting stable fixation and early mobilisation
- Practical Emphasis
- Implant selection guided by fracture stability and bone quality
- Core Position
- Promotes fragility-fracture networks and fixation strategies tailored to osteoporotic bone
- Practical Emphasis
- Locked/augmented constructs and orthogeriatric co-management
Across frameworks the biomechanical principles are universal - they differ mainly in emphasis on system-level care (open-fracture timing, orthogeriatric pathways) rather than in the underlying mechanics.
Registry Evidence
- Arthroplasty and implant registries - NJR (UK), AJRR (US), AOANJRR (Australia), SHAR (Sweden), the Norwegian and New Zealand registries - track implant survival and revision and have repeatedly shown how design and fixation choices affect longevity. The same registry methodology increasingly captures fracture-fixation devices and peri-implant fractures.
- Registry data reinforce that construct and material choice (e.g. fixation mode, modulus, bearing) measurably influence revision rates over time.
High- vs Limited-Resource Practice Variation
- Well-resourced settings: full range of locking plates, multiple alloys, intraoperative imaging, cement/augmentation and orthogeriatric pathways are available, allowing precise tailoring of stiffness and stability.
- Limited-resource settings: reliance on a narrower implant range, more external fixation and conventional plating, and emphasis on robust, low-cost constructs; sound biomechanical reasoning (working length, screw purchase, load sharing) becomes even more important when implant options are constrained.
Controversies and Areas of Uncertainty
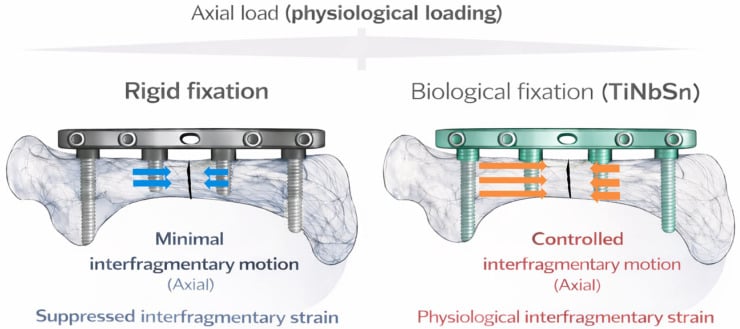
Optimal construct stiffness. Very stiff bridging constructs can suppress callus and lead to delayed union or nonunion, especially at the distal femur. Strategies to "soften" a construct, far cortical locking, a longer working length, titanium plates and fewer screws near the fracture, aim to allow healthy micromotion, but the ideal target stiffness is still debated.
Routine implant removal. Whether to remove plates after union, to reverse stress shielding and reduce the refracture risk, is contested. Removal carries its own risks, refracture through screw holes and neurovascular injury among them, and is increasingly reserved for symptomatic hardware rather than performed routinely.
Unicortical versus bicortical locking. Unicortical locked screws reduce dissection but provide less torsional and pullout resistance; the balance between soft-tissue preservation and mechanical security remains case-dependent.
Reaming in nailing. Reamed nailing improves fixation and union in closed fractures, but the marginal benefit in open tibial fractures is small, and debate continues over the embolic and biological cost of reaming set against the mechanical gain.
Why bone is lost under a plate. Two authorities cited on this page take opposite positions. Perren holds that cortical porosis has a biological rather than a mechanical explanation, necrosis-induced internal remodelling after the blood supply is damaged, and argues from that for minimising implant-bone contact. Uhthoff concludes the evidence "strongly suggests" the cause is stress shielding, not perfusion, pointing to histomorphometry in which necrosis sat in the periosteal cortical half and porosis in the endosteal half with no correlation between them. The practical recommendations converge on less rigid constructs and less contact, so the argument seldom changes what you do; it changes what you say when asked why, and the honest answer is that it is unresolved. Limited-contact designs, built on the perfusion theory, never showed superior clinical outcomes.
MCQ Practice Points
Q: What is the most important factor affecting screw pullout strength? A: Outer thread diameter and depth of engagement. Bicortical purchase increases strength 2-3x compared to unicortical. Bone density is also critical (osteoporotic bone has 50-70% reduced pullout strength).
Q: How does doubling the working length affect construct stiffness? A: Reduces stiffness by 8-fold (stiffness is inversely proportional to working length cubed). Longer working length = more flexible = more callus but higher implant stress.
Q: What percentage of stress is reduced in bone beneath a rigid plate? A: 50-80% stress reduction. This leads to bone resorption (Wolff's Law) and refracture risk if plate removed before remodeling (12-18 months).
Q: What are the four AO principles of fracture fixation? A: FREP: Fracture reduction, Rigid fixation (absolute or relative stability), Early mobilization, Preservation of blood supply.
Exam Viva Scenarios
Practise clinical reasoning and management decisions out loud
“A patient returns 2 years after femoral shaft fracture fixation with a plate. X-rays show cortical thinning beneath the plate. Explain the mechanism and management.”
“You are plating a comminuted mid-shaft tibial fracture. Discuss how you would determine the working length of your construct and the biomechanical rationale.”
“An 82-year-old woman has a distal femoral fracture fixed with a non-locking plate. At 6 weeks the screws have pulled out and the construct has collapsed into varus. Explain why this failed and how you would revise it.”
Key Concepts
- Wolff's Law: Bone adapts to stress (increased stress = formation, decreased = resorption)
- Stress shielding: Implant bears load, bone resorbs (50-80% stress reduction)
- Working length: Distance between nearest screws (longer = more flexible)
- Load sharing: Bone and implant share load (vs load bearing: implant carries all)
AO Principles (FREP)
- Fracture reduction: Anatomic (articular) or relative (diaphyseal)
- Rigid fixation: Absolute stability (compression) or relative (bridge plating)
- Early mobilization: Prevent stiffness during healing
- Preservation of blood supply: Minimize stripping, biological fixation
Screw Mechanics
- Pullout strength: Bicortical 2-3x stronger than unicortical
- Diameter effect: Pullout proportional to diameter squared
- Osteoporotic bone: 50-70% reduced holding power
- Failure modes: Pullout (tension), shear, stripping, fatigue
Working Length
- Short working length: Rigid, less callus, higher implant stress
- Long working length: Flexible, more callus, load distribution
- Stiffness inversely proportional to length cubed (2x length = 8x less stiff)
- Optimal: 2-3 screw holes each side for diaphyseal fractures
Implant Properties
- Stainless steel: 210 GPa modulus (10x bone)
- Titanium: 110 GPa modulus (5x bone)
- Cortical bone: 20 GPa modulus
- Elastic mismatch creates stress concentration at interface
Evidence Base and Key Studies
Strain Theory & the Scientific Basis of Biological Internal Fixation
- Interfragmentary strain theory: tissue at the fracture gap can only form if local strain stays below the strain tolerance of that tissue (granulation tissue tolerates high strain, lamellar bone very little)
- Flexible (relative) stability induces callus; rigid fixation of a small gap with even minimal motion produces high strain and impairs direct healing
- The internal fixator splints rather than compresses, preserving periosteal blood supply and enabling minimally invasive percutaneous osteosynthesis (MIPO)
- PERREN ARGUES THE OPPOSITE OF THE CARD BELOW: he states that bone loss and stress protection have a BIOLOGICAL rather than a mechanical explanation, attributing cortical porosis to necrosis-induced internal remodelling following damage to the blood supply, and on that basis argues for avoiding extensive implant-bone contact
- The same necrosis-induced internal remodelling is offered as the mechanism of DIRECT healing itself - the cutting cones that cross an anatomically reduced, compressed fracture are the same remodelling response, which is why direct healing produces no callus and is slow
Internal Plate Fixation: Stress Shielding & Cortical Porosis
- Rigid plates cause cortical porosis, delayed bridging and refracture after plate removal
- Histomorphometry showed necrosis predominantly in the periosteal cortex and porosis in the endosteal cortex, with no positive correlation between them
- Evidence favoured stress shielding (not interference with cortical perfusion from plate-bone contact) as the dominant cause of bone loss
- Motivated axially compressible plate designs that reduce stress shielding during remodelling