Vancouver Classification | Stem Stability | Bone Stock
- Vancouver classification combines location, stem stability and bone stock but does not encode host frailty, infection or fracture morphology
- B1 versus B2 is frequently misclassified on radiographs; review prior films, stem design, cement mantle and intraoperative findings
- Revision is standard for most loose stems, but selected B2 ORIF is reported in frail patients or specific cemented polished-taper patterns
- ORIF construct is fracture- and implant-specific: plate, cables, screws, strut and orthogonal fixation may be combined
- Exclude infection and osteolysis because both change fixation, revision and staging
- “A = Around trochanters (above stem tip)
- “B = Around stem body (B1/B2/B3)
- “C = Below stem (treat as standard fracture)
- “Cementless stems loosen differently to cemented
Overview
What they are. Periprosthetic femoral fractures occur around hip stems. They include intraoperative cracks, postoperative fragility or traumatic fractures, and failures through osteolytic or infected bone.
How they are described. By location, stem stability and bone stock, then refined by fracture morphology, implant design, infection, host physiology and reconstructive resources. B1 usually receives ORIF when the stem is truly stable. B2/B3 usually require revision, but patient physiology, cemented-stem mechanics, fracture reducibility and operative burden may justify selected alternatives, and B2 fixation without stem exchange is reported in carefully chosen high-risk patients and certain cemented-stem patterns. Classification supports operative judgement; it does not replace it.
Risk factors. They fall into three groups:
- Patient: osteoporosis, frailty, inflammatory disease, falls
- Implant: revision stem, fixation design, stress shielding, osteolysis
- Technical: cortical perforation, stem malposition, prior windows or osteotomies, and interprosthetic stress risers
Anatomy and Implant Design
The proximal femur. Four landmarks recur through this topic:
- Greater trochanter - insertion of the hip abductors (gluteus medius, gluteus minimus); a fracture here (Type AG) affects abduction strength
- Lesser trochanter - insertion of iliopsoas; an avulsion (Type AL) may indicate underlying osteolysis and stem loosening
- Femoral shaft - the cortical tube surrounding the stem, whose bone quality is critical for fixation
- Calcar - the medial cortex at the base of the femoral neck, often resected or resorbed around stems
Blood supply. Arthroplasty disrupts the femoral head supply, which is not relevant to fracture healing. The shaft is supplied by the nutrient artery and the periosteum, and fracture healing relies on periosteal and endosteal blood supply. Extensive soft-tissue stripping during ORIF may compromise healing.
Cemented stems. The cement mantle transmits forces to bone, and a fracture runs through the cement or at the cement-bone interface. They are generally more stable initially.
Uncemented stems. These are press-fit and rely on bone ingrowth, through either an extensive (fully coated) or a proximal porous coating. Stress shielding can weaken the proximal bone over time.
Stem geometry. Three shapes:
- Straight stems are easier to bypass with long revision stems
- Curved or anatomic stems may limit revision options
- Modular stems allow length adjustment but have junction points that may fail
Loads. The hip joint reaction force is 3-5x body weight during walking, and the abductors stabilise the pelvis in single-leg stance. Hip rotation puts torsional stress on the shaft, and the anterior bow of the femur creates bending stress.
Pathophysiology
Periprosthetic fractures result from the interaction between bone quality, implant characteristics and mechanical forces.
Intraoperative fractures. Broaching, reaming, extraction and press-fit insertion are the moments of risk, and an osteoporotic or narrow femur, deformity and oversized components add to it. Calcar, trochanteric and cortical perforation patterns require immediate stability assessment.
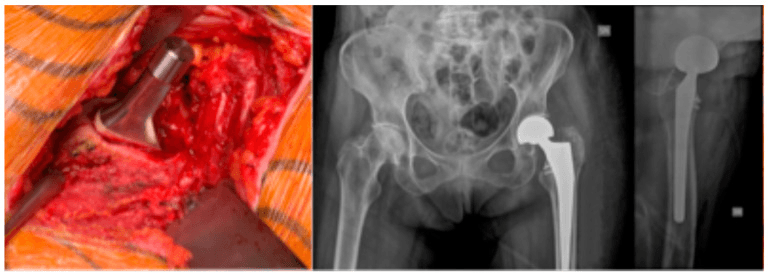
Postoperative fractures. The causes are a fall or torsion around a stable or a loose stem, progressive osteolysis, infection or stress concentration. Interprosthetic segments and previous holes or windows are stress risers; surgical defects such as cerclage wire holes and screw holes from prior surgery create weak points.
The stem tip. The tip acts as a fulcrum and a stress riser during loading. The bending moment is greatest 2-3 cortical diameters below the stem tip, and Type C fractures commonly occur there. Longer, stiffer stems increase the stress concentration.
Torsion. Excessive torsion produces spiral fractures. Around a cemented stem the cement-bone interface can fail in torsion; around an uncemented stem the bone-implant interface may fail if it is not well fixed.
Fatigue. Repeated loading causes fatigue micro-damage, normally repaired by bone remodelling. If damage accumulates faster than it is repaired, a stress fracture results, which may present as an impending fracture with progressive pain.
The bone around the implant. A stiff stem bypasses the proximal bone and reduces its load, and the bone resorbs (Wolff's law); this stress shielding is common with fully coated stems. Stress shielding, osteolysis, cortical remodelling and cement or implant interface failure alter both fracture risk and fixation options. Their distribution depends on stem design, fixation and time, so universal Gruen-zone or percentage claims should be avoided.
What makes the fracture stable. Four things determine fracture stability:
- Stem fixation and design
- Fracture geometry and the ability to obtain length, alignment and rotation
- Proximal and distal bone stock
- Soft-tissue attachments, infection and host physiology
Vancouver Classification
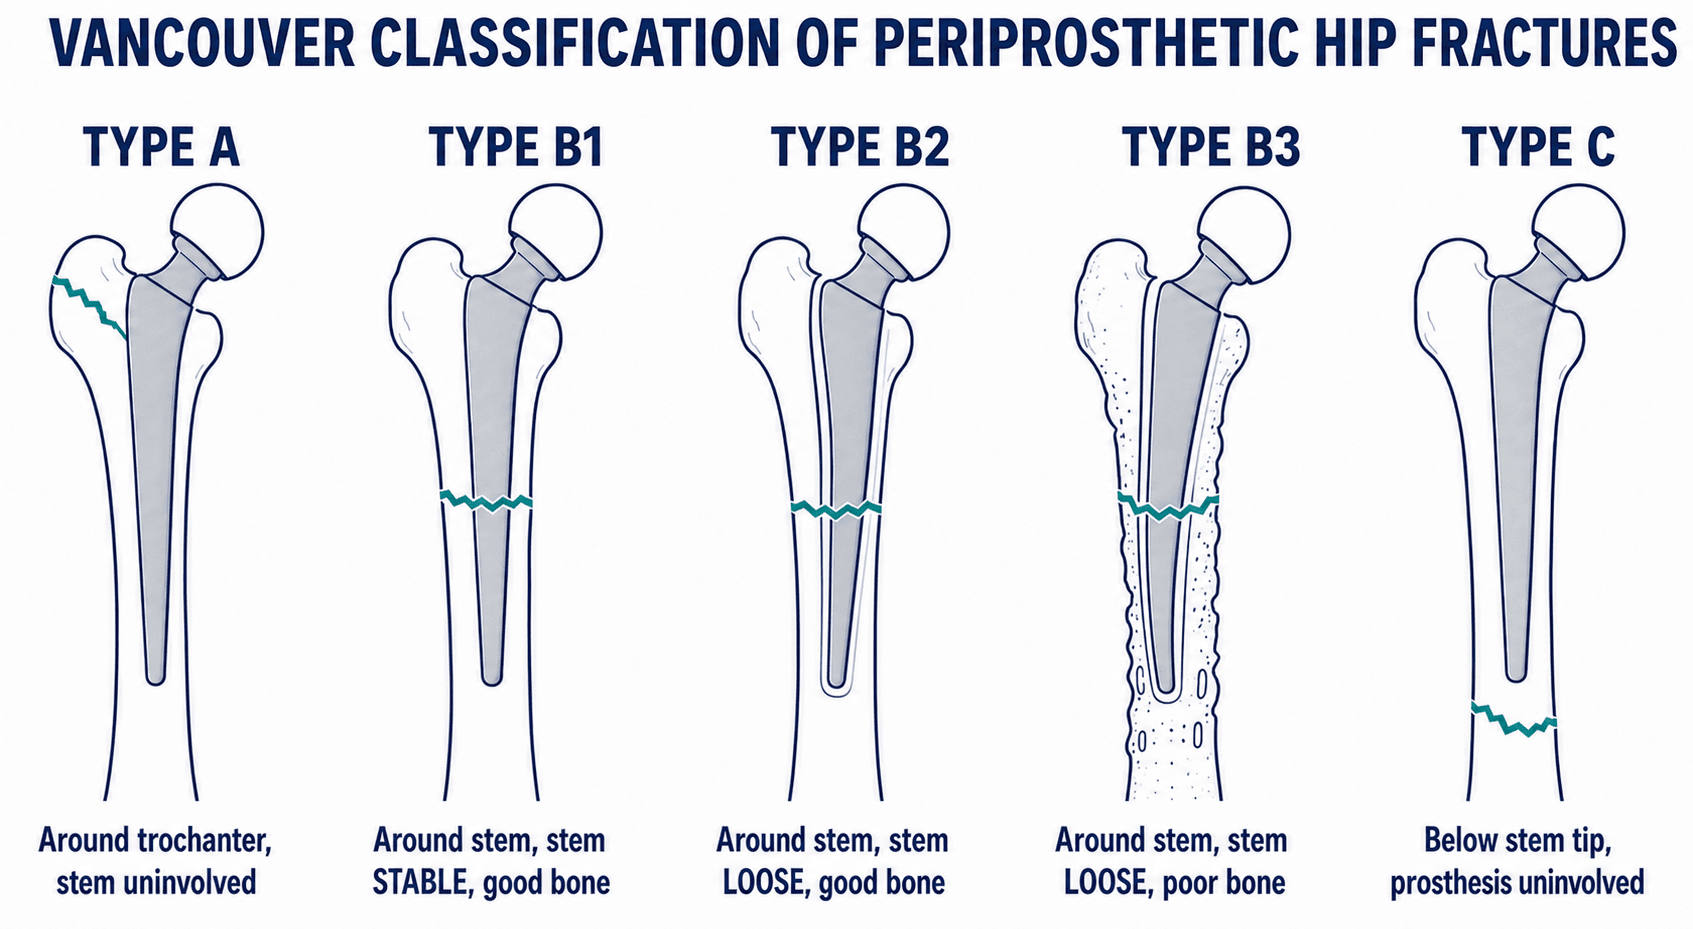
The Vancouver classification sorts the fracture by location (A, B, C), then subdivides Type B by stem stability and bone stock. Type B, a fracture around or at the level of the stem, is the most common and the most challenging.
- Location
- Greater trochanter
- Stem Status
- Stable
- Bone Stock
- N/A
- Treatment
- Conservative (unless displaced)
- Location
- Lesser trochanter
- Stem Status
- Stable
- Bone Stock
- N/A
- Treatment
- Conservative (check for loosening)
- Location
- Around stem
- Stem Status
- Stable
- Bone Stock
- Good
- Treatment
- Usually fracture-specific ORIF
- Location
- Around stem
- Stem Status
- Loose
- Bone Stock
- Good
- Treatment
- Usually revision; selected ORIF exceptions
- Location
- Around stem
- Stem Status
- Loose
- Bone Stock
- Poor
- Treatment
- Revision plus reconstruction/replacement
- Location
- Below stem tip
- Stem Status
- Assess separately
- Bone Stock
- Variable
- Treatment
- Fracture-specific fixation; account for stem
Type A. AG is a greater trochanter fracture and AL a lesser trochanter fracture, with the stem tip uninvolved. Treatment is usually conservative, unless significant displacement affects abductor function (AG) or the avulsion suggests stem loosening from osteolysis (AL).
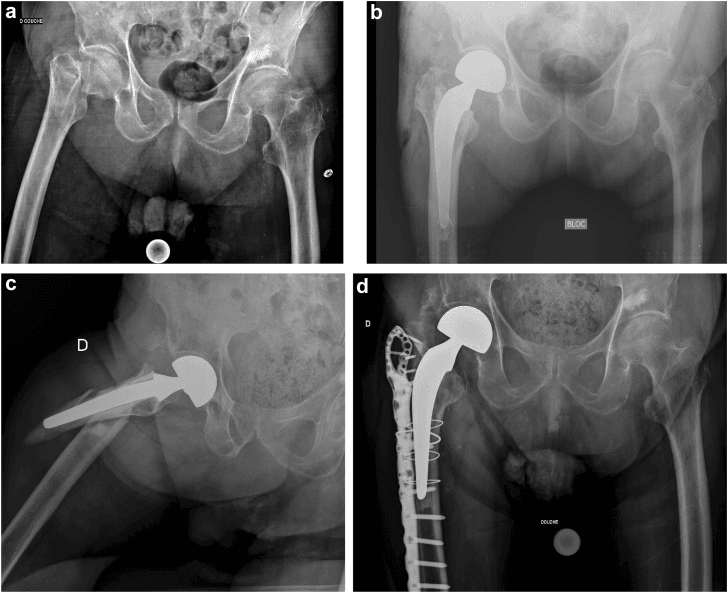
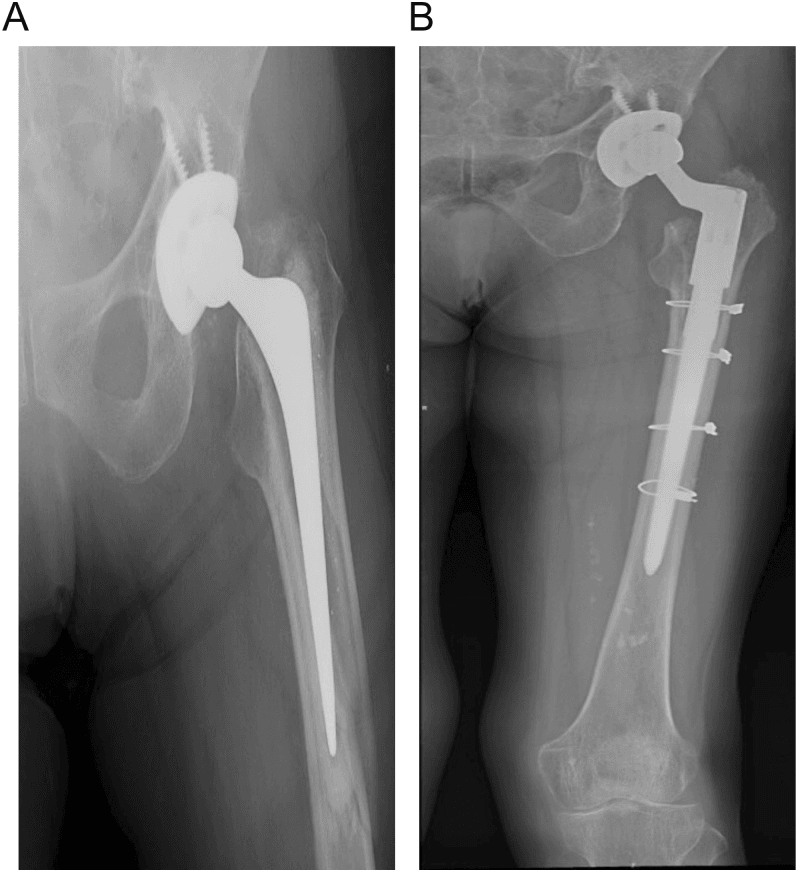
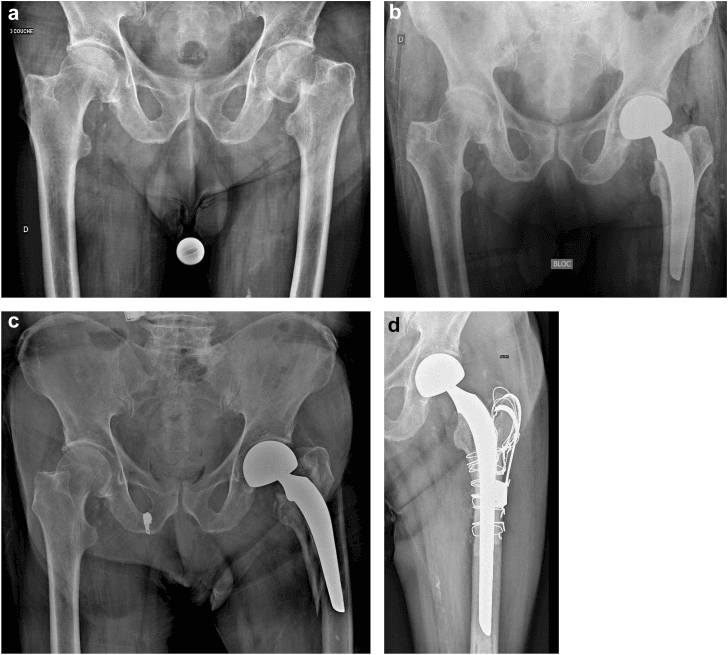
Type B. The subtype drives treatment. B1 is a fracture around a stable stem with adequate bone stock; B2 around a loose stem with usable bone; B3 around a loose stem with deficient bone. B1 versus B2 is frequently misclassified on radiographs.
Type C. The fracture lies well below the stem tip and is treated mechanically like a shaft fracture, but the prosthesis is not irrelevant. Plate-stem overlap, interprosthetic stress risers, stem fixation and total femoral alignment still matter. Confirm stem fixation, map the stem tip and any other implant, avoid an unprotected stress riser, and choose plate or nail fixation only when implant geometry permits.
Clinical Assessment
Mechanism. A fall from standing height is the most common, and a low-energy injury indicates a pathological fracture through weakened bone. High-energy trauma, such as a motor vehicle accident, is rare but possible and may bring associated injuries. Severe osteoporosis or osteolysis may cause an atraumatic fracture.
Pain. Note its severity. Acute onset suggests an acute fracture; chronic or progressive pain may indicate an impending fracture or loosening. Pain may be felt in the groin (hip), the thigh (shaft) or the knee, referred from the hip.
The arthroplasty and the patient. The history also covers the implant and the host:
- Implant type and age; time since THR, recent or remote, affects the likelihood of loosening
- Previous revisions, with a higher risk of bone loss and complications
- The reason for the THR (osteoarthritis, fracture, inflammatory arthritis), which affects bone quality
- Pre-injury mobility: walking aids, distance, independence
- Osteoporosis: fragility fractures, DEXA results, current treatment
- Medications: bisphosphonates, steroids, anticoagulation
- Comorbidities (cardiac, respiratory, renal) that affect surgical risk; smoking and alcohol, which impair bone healing
Look. Look for shortening and rotation, usually external rotation if displaced. Thigh swelling is common, and ecchymosis may appear after several days. Note previous incisions (lateral, posterior, anterolateral), check the wound (an open fracture is rare), and measure leg length from umbilicus to medial malleolus against the other side.
Feel and move. Tenderness localises to the fracture site (trochanteric, shaft or distal thigh), and crepitus may be palpable on gentle manipulation. Check for tense compartments, which are rare but possible. Hip movement is painful and limited; do not force it if a fracture is suspected. Examine the knee to rule out an ipsilateral knee injury.
Neurovascular examination. This is critical, and the baseline is documented carefully for medicolegal reasons:
- Pulses: femoral, popliteal, dorsalis pedis, posterior tibial
- Femoral nerve: quadriceps strength (knee extension) and sensation over the anterior thigh
- Sciatic nerve: ankle dorsiflexion (deep peroneal), plantarflexion (tibial) and sensation
Sciatic nerve palsy can occur with periprosthetic fractures, especially posterior fracture-dislocations or during revision surgery. Sciatic nerve injury dramatically worsens prognosis.
Fitness for surgery. Medical optimisation covers cardiorespiratory fitness (exercise tolerance, functional capacity), anaemia (common in the elderly, and a pre-operative transfusion may be needed), anticoagulation (warfarin or DOACs, with reversal planned for surgery) and nutrition (albumin; protein-calorie malnutrition impairs healing).
Frailty. Cognitive function sets the delirium risk and the ability to comply with weight-bearing restrictions. Social support (home situation, carers) shapes discharge planning. Goals of care come into it too: some patients with severe comorbidities may decline surgery.
Investigations
Radiographs. Four studies:
- AP pelvis - both hips for comparison; shows the acetabular component and pelvic discontinuity if present
- AP hip - centred on the affected hip, for a better view of the stem and proximal femur
- Lateral hip - cross-table or frog lateral; anterior or posterior displacement and stem position in the sagittal plane
- Full-length femur - AP and lateral from hip to knee; essential to see the entire prosthesis and exclude a distal fracture
Always obtain previous post-operative X-rays for comparison. Without these, assessing stem stability and subsidence is very difficult. Contact the hospital/surgeon who performed the THR to obtain historical imaging.
Is the stem loose? Stem stability is a diagnosis. Radiographic B1 versus B2 agreement is only moderate-substantial (kappa about 0.68, Naqvi 2012), and some stems labelled stable on radiographs are loose intraoperatively. Compare serial films, understand the fixation philosophy of the stem, and test it directly when exposure permits. No single lucent-line rule is definitive, the 2mm lucency below included.
Look for the signs of a loose stem:
- Subsidence - distal migration compared with the immediate post-operative films, measured from the lesser trochanter to the stem shoulder
- Radiolucent line around the stem greater than 2mm, especially if progressive or circumferential
- Cement mantle fracture (cemented stems)
- Varus or valgus tilt from the original position
- Pedestal formation - bone at the stem tip blocking further subsidence, which indicates prior loosening
and for those of a stable one:
- No subsidence from the post-operative films
- Bone ingrowth: spot welds, cortical hypertrophy, trabecular remodelling (uncemented stems)
- An intact cement mantle (cemented stems)
- No lucent lines, or only thin, non-progressive lines less than 1mm
SLIPSSigns of Stem Loosening
Hook:SLIPS prompts a structured stem-stability assessment, not an automatic diagnosis.
Bone stock and morphology. Map comminution, cortical support, fracture extension, osteolysis and any interprosthetic segment. Good bone has adequate cortical thickness, normal density and minimal osteolysis. Poor bone means severe osteoporosis, extensive osteolysis (especially Gruen zones 1, 7 and 8), cortical thinning or cavitary defects.
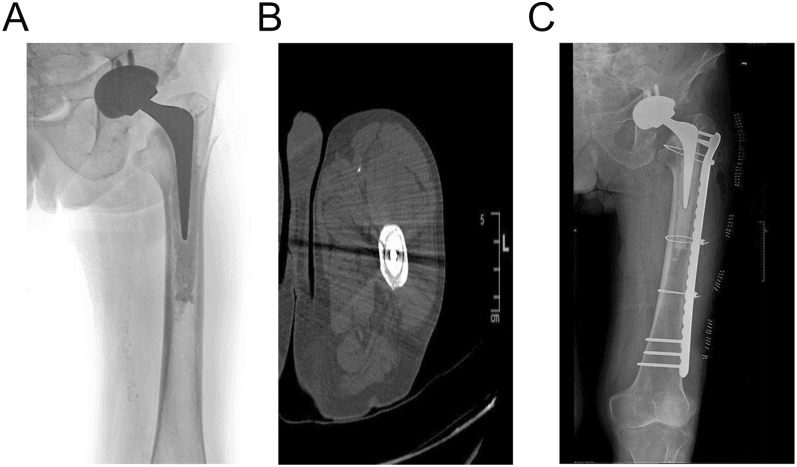
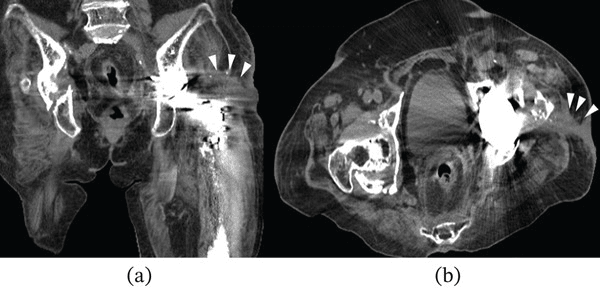
CT is indicated for complex fracture patterns, bone stock, revision planning and the cement mantle. It shows displacement, bone defects and osteolysis better than radiographs, and 3D reconstructions help in complex cases. Metal artefact is the limitation; metal artefact reduction software (MARS) improves image quality.
MRI is rarely indicated for acute fractures because metal artefact is prohibitive. Possible uses are the soft tissues (muscle tears), occult fractures and suspected infection.
Bone scintigraphy or SPECT-CT is not routine for acute fractures. It may help differentiate fracture from loosening in chronic pain, and assess for infection.
Bloods. A routine set:
- FBC: haemoglobin, and the white cell count as an infection screen
- U&E: renal function, for surgical planning and contrast if CT is needed
- Coagulation: INR if on warfarin, and bleeding risk
- Bone profile: calcium, phosphate, ALP, screening for osteoporosis or metabolic bone disease
- CRP and ESR: elevated in fracture, but very high levels raise concern for infection
Infection. CRP and ESR are elevated in infection but also in fracture. If there is any suspicion of prosthetic joint infection, aspirate the hip under image guidance for cell count, culture and alpha-defensin; a synovial WCC greater than 3000 cells/μL or PMN greater than 80% suggests infection.
Bone health. Vitamin D deficiency is common in the elderly and is corrected before surgery. Check PTH if there is hypercalcaemia or renal dysfunction. A DEXA scan may be arranged electively after surgery to guide osteoporosis treatment.
Differential diagnosis. The painful arthroplasty with a possible fracture has important mimics. Missing infection or loosening before fixing a fracture is a classic exam (and clinical) trap.
- Key clue
- Acute pain after a fall, deformity, cortical break on X-ray
- Decisive test
- Full-length femur radiographs +/- CT
- Why it matters
- Drives the Vancouver/UCS treatment algorithm
- Key clue
- Chronic start-up thigh pain, no clear injury
- Decisive test
- Serial X-rays: subsidence, progressive lucent lines, pedestal
- Why it matters
- Loose stem mandates revision even without a fracture - and upgrades a B1 to B2
- Key clue
- Rest/night pain, warmth, raised CRP/ESR, sinus
- Decisive test
- CRP/ESR, image-guided aspiration (cell count, culture, alpha-defensin)
- Why it matters
- Changes plan to debridement or staged revision; never implant into sepsis
- Key clue
- Progressive pain, no displaced cortical break, stress riser
- Decisive test
- Repeat X-ray, CT, bone scan/SPECT-CT
- Why it matters
- Prophylactic fixation prevents catastrophic completion
- Key clue
- Lateral pain, weak abduction, no fracture line
- Decisive test
- Examination +/- ultrasound or MARS MRI
- Why it matters
- Non-operative or soft-tissue problem - avoid unnecessary fixation
- Key clue
- Gruen-zone lysis, polyethylene wear
- Decisive test
- X-ray, CT for defect mapping
- Why it matters
- Bearing exchange and grafting before fracture occurs
Management
The decision. Location, stem stability and bone stock frame the plan; host physiology, infection, stem design, reducibility and fracture mechanics complete it. A truly stable stem is usually fixed and a loose stem usually revised. Selected B2 ORIF without stem exchange is an exception for carefully defined host and implant situations, particularly when the revision burden is prohibitive or a reducible fracture surrounds a specific cemented polished-taper construct. It requires explicit host- and implant-specific justification.
Before theatre. Surgery is planned urgently and performed after optimisation. Exclude infection where indicated, and have blood, revision expertise, implants and instruments available. A stable-stem pattern needs fracture-specific ORIF options (plates, locking attachments, screws, cerclage and strut augmentation); a loose-stem pattern needs revision stems and extraction and reconstruction equipment.
Critical decision: Stem stability changes the operation, but radiographs and even limited intraoperative exposure may be misleading. Prepare revision implants before committing to fixation; a suspected B1/B2 needs both fixation and revision strategies available. Uncertainty should trigger senior revision planning rather than a reflex label.
Indications. A truly stable stem with a reconstructible fracture, or a distal Type C fracture whose implant geometry permits independent fixation.
The construct. The aim is to restore length, alignment and rotation with a construct matched to the fracture morphology and the fixation corridors available. Lateral or orthogonal plates, cerclage, locking or conventional screws and strut augmentation are chosen from morphology, stem obstruction and bone stock; a cable plate is not mandatory.
- Choose the exposure and reduction strategy from fracture morphology and the revision contingency
- Use a plate of adequate length and working length; obtain bicortical fixation where safe, and use stem-compatible locking attachments, unicortical screws or cerclage where the stem blocks a corridor
- Add orthogonal fixation or a strut only when a mechanical or biological deficit warrants it
- Span vulnerable stem tips and adjacent implants to avoid a new stress riser
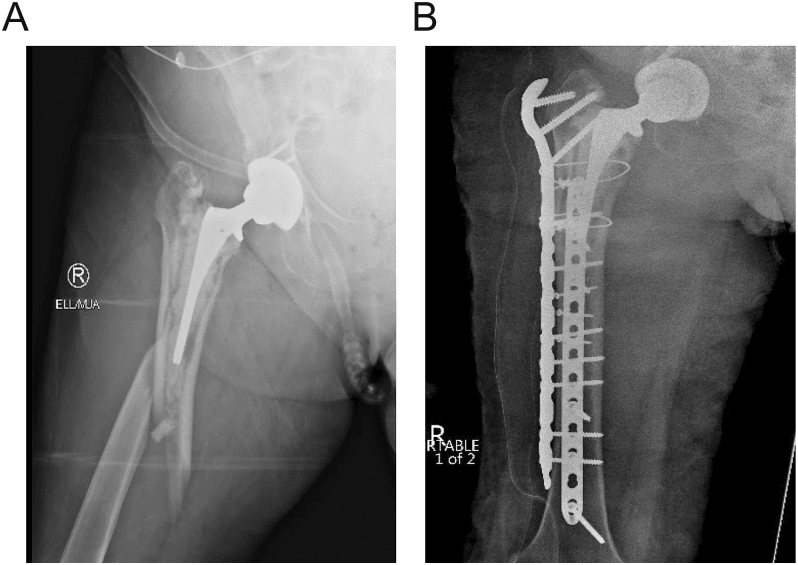
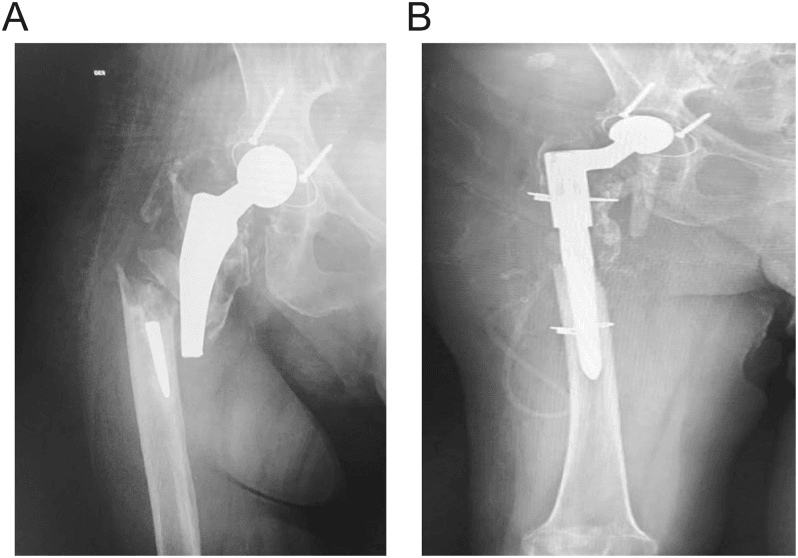
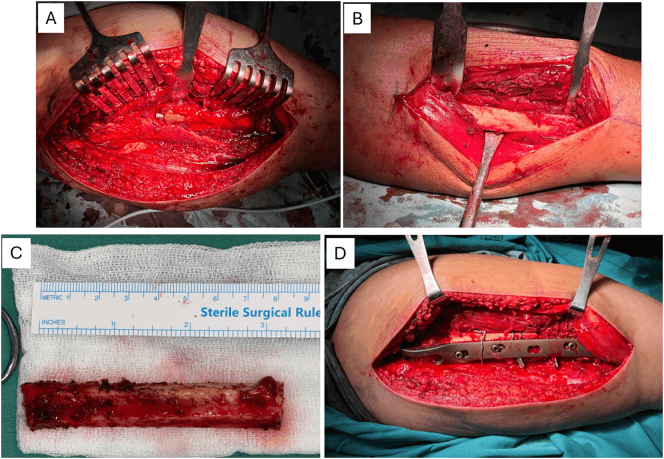
- ORIF (B1/C)
- Stable stem OR below stem
- Revision Stem (B2)
- Loose stem, good bone stock
- Revision + Augmentation (B3)
- Loose stem, poor bone stock
- ORIF (B1/C)
- Lateral
- Revision Stem (B2)
- Lateral or posterolateral
- Revision + Augmentation (B3)
- Extended lateral or transfemoral
- ORIF (B1/C)
- Plate/screw/cerclage strategy matched to fracture
- Revision Stem (B2)
- Revision stem plus fracture reconstruction
- Revision + Augmentation (B3)
- Revision or replacement plus structural/biological reconstruction
- ORIF (B1/C)
- Retain only after stability is established
- Revision Stem (B2)
- Obtain fixation beyond compromised bone
- Revision + Augmentation (B3)
- Individualised to remaining distal bone
- ORIF (B1/C)
- Use only for a defined mechanical or biological deficit
- Revision Stem (B2)
- Plate, cerclage or strut as required
- Revision + Augmentation (B3)
- Strut, graft, composite or replacement options
- ORIF (B1/C)
- Based on achieved construct stability
- Revision Stem (B2)
- Based on stem and fracture stability
- Revision + Augmentation (B3)
- Based on reconstruction and host
- ORIF (B1/C)
- Missed loosening or inadequate construct
- Revision Stem (B2)
- Poor distal fixation or fracture instability
- Revision + Augmentation (B3)
- Infection, instability, nonunion and abductor failure
- ORIF (B1/C)
- Low-moderate
- Revision Stem (B2)
- Moderate
- Revision + Augmentation (B3)
- High
Surgical Technique
Testing stem stability in theatre. The whole algorithm hinges on B1 versus B2, and because radiographs are imperfect for it, the definitive judgement is made in theatre. The working diagnosis is reassessed there, by exposing and testing the stem safely whenever uncertainty remains:
- Expose enough to see and grip the implant. Through the fracture, or after opening the interval, clear soft tissue off the stem shoulder or trunnion so a controlled force can be applied directly to the implant.
- Apply torque and push-pull. Apply a rotational and an axial force to the exposed stem or trunnion, directly or through a trial head or impactor, and watch the bone-implant (or cement-bone) interface.
- Read the fixation type. For a cemented stem, inspect the stem-cement and cement-bone interfaces and the mantle; for a cementless stem, look for ingrowth versus toggle or subsidence.
Reading the result. Independent implant motion at the interface, visible micromotion, a rock, interface opening, or blood or fluid pumping out of the interface indicates a loose stem (B2/B3). A stem that is rock-solid with no motion under applied torque is stable (B1). Interpret any motion in the context of stem design and fracture mobility, avoid destructive testing, and involve revision expertise when stability remains uncertain. The final decision combines direct testing with fracture reducibility, host physiology, stem design and infection status.
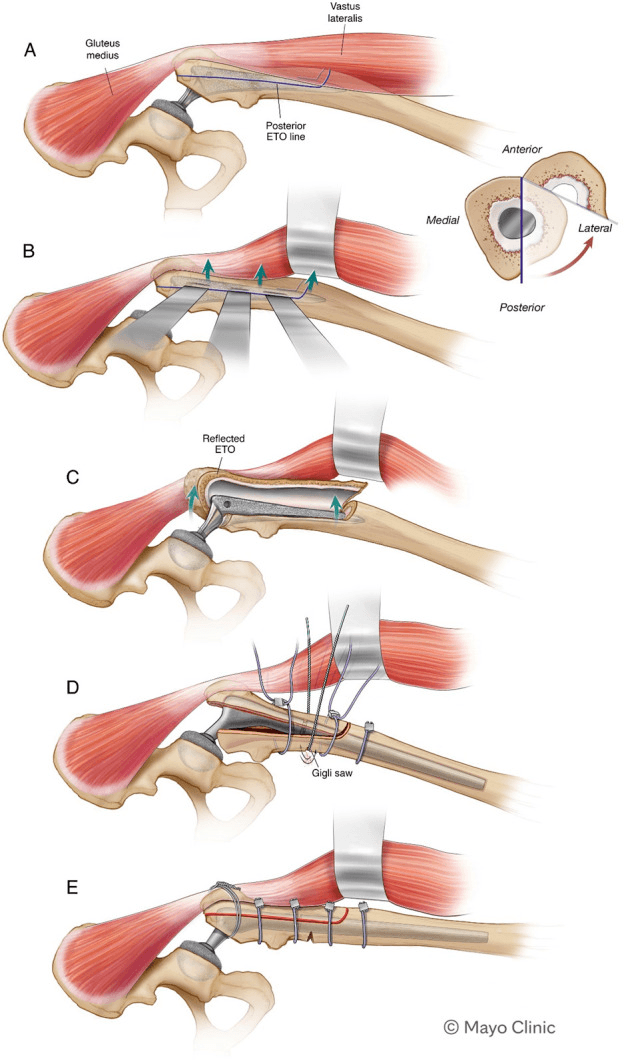
Extended trochanteric osteotomy. Once a stem is confirmed loose, or a well-fixed stem must come out, the ETO is the workhorse exposure: for revising a B2 or B3, and for removing a well-fixed cemented or cementless stem. It is a planned, controlled osteotomy that raises an anterolateral cortical fragment of the proximal femur, including the greater trochanter, kept attached to the abductors and vastus lateralis and hinged laterally on its soft tissues as a vascularised muscle-osseous flap. It gives direct access to the bone-implant interface and the cement mantle while preserving the abductor mechanism. Femoral bone-loss grading (the Paprosky system) is covered in its own topic.
- Fashioning it. The fragment is typically about one-third of the cortical circumference, its length planned to just reach the level of the stem tip or cement while leaving enough intact distal diaphysis (commonly at least 4-6 cm) for the revision stem to gain a scratch-fit. Rounded osteotomy corners reduce the risk of propagation.
- What it allows. Safe removal of a well-fixed stem and all cement (curettes, osteotomes, cement splitters, ultrasonic tools) without blindly perforating the cortex, and correction of varus remodelling or deformity so a straight revision stem can pass.
- Closing it. A long cementless bypass stem (extensively porous-coated or tapered-fluted modular) gains distal fixation beyond the osteotomy, and the fragment is reduced and secured with cerclage cables or wires around the stem. Union is reliable, roughly 90% or more.
- Pitfalls. A flap too short for access, migration or nonunion of the fragment, and inadvertent propagation into a fracture; plan the length and the repair carefully.
Complications
Nonunion. Occurs in 5-10% after ORIF, and more often after revision surgery. Poor bone quality, inadequate fixation, radiation therapy and a loose stem are the risk factors. It is managed by revision to a long stem with bone grafting, or conversion to arthroplasty if severe.
Infection. The risk is 2-5% after ORIF and 5-15% after revision, higher in elderly patients with comorbidities. Perioperative antibiotics and meticulous technique prevent it. Treatment is debridement with or without implant retention, or two-stage revision, depending on timing and organism.
Re-fracture. Occurs in 3-8%, typically at plate or nail ends, where they act as stress risers. Adequate fixation length bypassing lesions prevents it. Management is extension of the fixation or revision to a longer implant, with bone quality and patient factors considered.
Neurovascular injury. The sciatic nerve is at risk in posterior approaches and revision surgery (1-2%), and the femoral vessels with anterior cortical penetration. Careful technique and avoiding over-retraction prevent it. Management is early recognition, with nerve exploration if there is a deficit.
Dislocation. Occurs in 2-10% after revision arthroplasty, and more often with proximal femoral replacement. Abductor deficiency, component malposition and multiple revisions are the risk factors. Management is closed reduction, with a constrained liner or dual mobility cup considered for recurrent cases.
Implant failure. Inadequate fixation, progressive bone loss, screw pullout and plate breakage cause it, with poor bone quality, an inadequate construct and patient non-compliance as risk factors. Management is revision with improved fixation, cement augmentation, or conversion to arthroplasty.
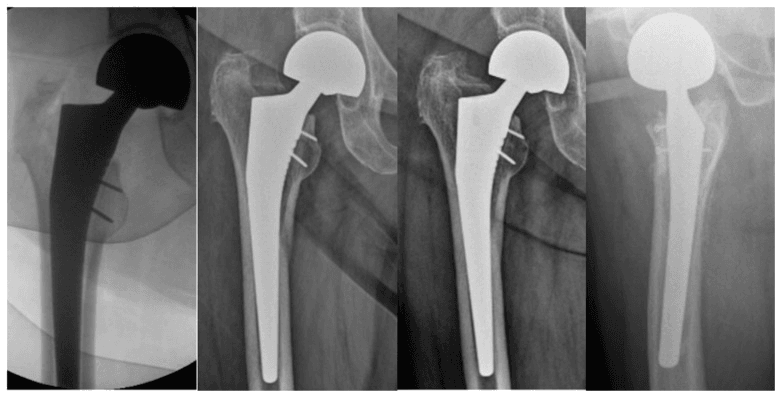
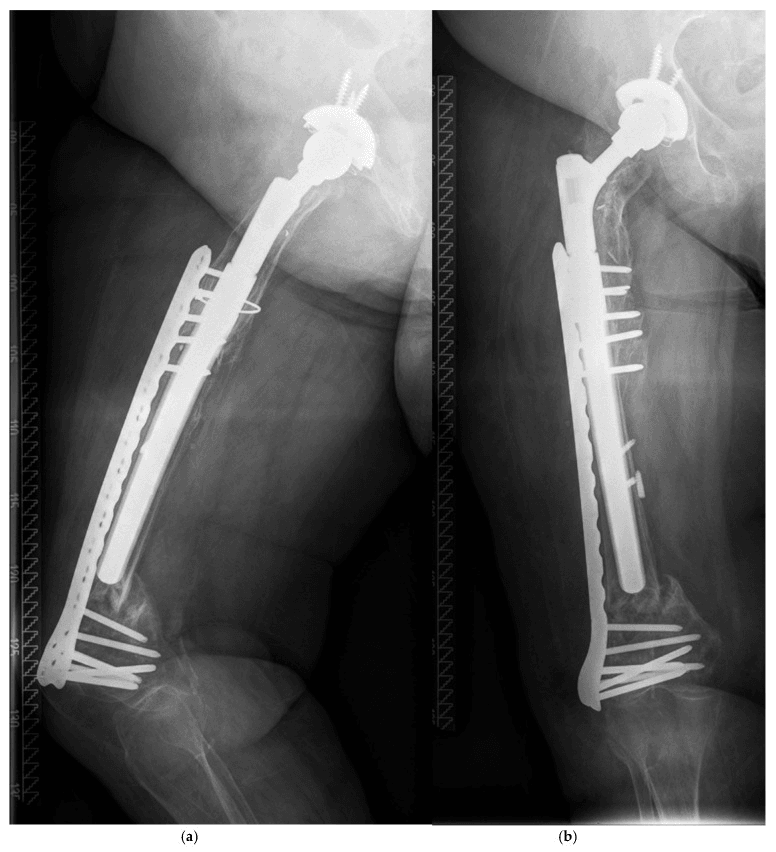
Key prevention measures: Adequate fixation length (bypass fracture/lesion by 2-3 cortical diameters), cement augmentation in poor bone, protected weight-bearing until union where the construct needs it, treatment of osteoporosis, early recognition and management of complications.
Thromboembolism. DVT or PE occurs in 2-5% despite prophylaxis, and elderly patients with prolonged immobility are at highest risk. Mechanical and pharmacological prophylaxis are essential.
Cardiopulmonary complications. MI, pneumonia and respiratory failure are more common in elderly patients undergoing revision surgery. Medical optimisation and early mobilisation are critical.
Mortality. 30-day mortality is 2-5% and one-year mortality 10-20%, higher in elderly and comorbid patients and comparable to native hip fractures. Early surgery and medical optimisation improve outcomes.
Postoperative Care and Rehabilitation
Loading. Weight-bearing is prescribed from the stability achieved, the fixation or revision strategy, bone quality, concomitant injury and the patient's ability to comply, not by an automatic six- or twelve-week restriction. Mobilise early. Some stable reconstructions permit weight-bearing as tolerated; mechanically vulnerable constructs may need temporary protection with scheduled radiographic reassessment, and the weight-bearing steps in the timeline apply to them.
Postoperative Rehabilitation Protocol
Multimodal analgesia (paracetamol, NSAIDs if safe, opioids as needed), with regional techniques where appropriate.
Thromboprophylaxis follows the applicable hip-fracture or arthroplasty protocol after balancing venous thromboembolism and bleeding risks, with mechanical measures when indicated.
Monitor the wound for signs of infection, and remove a drain when output is less than 30mL/24hr.
Physiotherapy for gait training with aids, hip range of motion and isometric strengthening; avoid hip flexion greater than 90 degrees initially.
6-week X-rays assess alignment, fixation and early union, and look for hardware loosening and subsidence. If they are satisfactory and pain is controlled, a protected construct may advance to partial weight-bearing (30-50% body weight).
Start osteoporosis treatment if not already on it: calcium and vitamin D supplementation, and consider bisphosphonates or denosumab.
12-week X-rays are critical, for callus formation (ORIF), stem stability (revision), hardware integrity and maintained alignment.
Progress to weight-bearing as tolerated if union is progressing; most B1 ORIF cases are fully weight-bearing by 12 weeks if united.
Progressive resistance exercises for the hip abductors, extensors and quadriceps, with pool therapy if available.
6-month X-rays should show union after ORIF and stable fixation after revision.
The goals are independent ambulation, stairs and return to activities of daily living; gait aids may still be needed.
Driving may resume when the patient can safely perform an emergency stop (typically 6-8 weeks; check insurance requirements). Return to work depends on occupation: sedentary work at 6-12 weeks, physical work at 3-6 months.
Annual review for late complications: loosening, periprosthetic osteolysis, further fractures.
Continue osteoporosis management long-term, monitoring bone density by DEXA and treating underlying causes. Falls prevention covers home assessment, balance training, medication review and visual or vestibular problems.
Educate the patient on warning signs requiring urgent review: pain, deformity, wound issues.
Discharge planning. Involve occupational therapy, and plan for:
- Equipment: elevated toilet seat, shower chair, reaching aids, walking frame or crutches
- Home modifications: remove trip hazards, install grab rails, and keep bedroom and bathroom on the same level if possible
- Support services: home care package, meals on wheels, community physiotherapy
- Education: hip precautions (avoid low chairs and crossing the legs), weight-bearing restrictions, signs of complications and when to seek help
Guidelines, Registries & Global Practice
Global Epidemiology
- Periprosthetic femoral fracture is now among the leading indications for revision THA worldwide, rising as the primary arthroplasty population ages.
- Swedish Hip Arthroplasty Register: postoperative incidence approximately 0.4% after primary THA and 2.1% after revision THA, increasing from roughly 1.0 to 1.4 per 1000 primary THRs over the study era.
- Cementless (uncemented) stems carry the higher INTRAoperative fracture risk (hoop stress on press-fit); cemented stems carry relatively more LATE fractures at the cement-tip stress riser.
- Most LATE periprosthetic fractures occur around an already-loose stem (Swedish register), which is why a high proportion of type B fractures prove to be B2/B3.
Side-by-Side Guidance
- Emphasis
- Combined ortho-geriatric, fragility-fracture pathway
- Practical recommendation
- Treat like a hip fracture - early senior-led surgery, medical co-management, definitive fixation that permits immediate full weight-bearing where possible
- Emphasis
- Evidence-based work-up and classification-led treatment
- Practical recommendation
- Exclude infection/loosening; ORIF stable stems, revise loose stems; treat underlying osteoporosis
- Emphasis
- Construct mechanics and fixation principles
- Practical recommendation
- Locked plate plus cerclage, adequate working length, bypass stem tip; unicortical/locking-attachment or cables at stem level
- Emphasis
- Unified Classification System (UCS A-F) and revision technique
- Practical recommendation
- Adopt UCS terminology; long cementless modular revision stem for loose stems, augmentation for bone loss
Registry Insights
- National registries (Swedish/SHAR, NJR England & Wales, AOANJRR Australia, AJRR US, Norwegian, NZJR) all record periprosthetic fracture as a discrete revision indication with rising frequency.
- Implant design influences risk: collarless polished tapered cemented and certain cementless designs differ in fracture pattern and timing; registries track these signals.
- Long cementless bypass stems dominate revision for loose stems; modular proximal femoral replacement is increasingly used for B3 with unreconstructable bone, especially in the frail elderly.
High- vs Limited-Resource Practice
- Well-resourced centres: pre-operative CT, full revision implant inventory (long modular stems, struts, megaprostheses), cell salvage, ortho-geriatric co-management, and tertiary referral pathways.
- Limited-resource settings: emphasis on robust plate-cerclage ORIF for stable stems and standard fixation for type C; revision implants and structural allograft may be scarce, so accurate B1 vs B2 triage and appropriate transfer are critical to avoid predictable ORIF failure on a loose stem.
- Universal priorities everywhere: early surgery, fracture-permitting weight-bearing, infection exclusion, and treatment of the underlying osteoporosis that drove the fragility fracture.
Related pages: Periprosthetic Fractures Around Total Hip Arthroplasty covers the same injury from the arthroplasty side and holds the acetabular periprosthetic fracture material this page does not; Revision THA for the femoral reconstruction that a B2 or B3 actually is - the fracture is the presentation, the revision is the operation; Extended Trochanteric Osteotomy for the exposure used to remove a well-fixed stem; Interprosthetic Femoral Fracture for the fracture caught between a hip and a knee implant, where both implants must be assessed and instability is commoner; TKA Periprosthetic Fractures for the knee equivalent, and the setting in which the Unified Classification System carded above was actually field-tested; Periprosthetic Joint Infection for the diagnosis that must be excluded before any revision, since a loose stem is not always a mechanical problem; Femoral Shaft Fractures for the fixation principles a type C fracture borrows; and Osteoporosis for the underlying disease that produced the fracture and will produce the next one if it goes untreated.
Controversies and Areas of Uncertainty
ORIF versus revision for B1 and C. Even with a confirmed stable stem, comparative data show plate ORIF carries a higher surgery-related complication rate than revision (Laurer 2011, 16 per arm), and one-year mortality after type-B fracture was 33% following ORIF against 12% following revision (Bhattacharyya 2007). Read that second figure carefully before it changes your practice: it is a single-institution retrospective case-control, not registry data, it rests on 8 deaths among 24 ORIF patients against 6 among 49, and above all the treatment was not randomised.
Surgeons offer ORIF to precisely the patients least fit for a revision, and to the stable stems that need less surgery - so the sicker cohort received the smaller operation and the comparison is confounded by indication in the direction of the result. The authors hedge it themselves, concluding only that revision "may be the preferred option" when either is feasible. What the paper does establish firmly is the 11% one-year mortality overall and the penalty for delay beyond two days. Many surgeons now revise borderline cases - but ORIF remains correct for a truly stable stem with good bone.
Cemented or cementless revision stem. Long cementless modular tapered-fluted stems dominate, but cementing into an osteoporotic or fractured femur risks extravasation and embolism. Optimal fixation in very poor bone remains debated; impaction grafting retains advocates.
Weight-bearing after fixation. Traditional protected weight-bearing competes with the fragility-fracture principle of immediate full weight-bearing. Construct- and patient-specific decisions prevail; high-quality evidence defining safe early loading is lacking.
Vancouver or the Unified Classification System. The UCS (A-F) extends Vancouver to all implants and joints with good reliability (Van der Merwe 2014). Whether it should fully replace Vancouver in everyday hip practice is still in transition, so know both.
Proximal femoral replacement. PFR gives immediate stability and early mobility for B3 in the frail elderly, at the cost of higher dislocation and infection rates and abductor compromise. Thresholds for PFR versus biological reconstruction (struts, impaction grafting) are not standardised.
MCQ Practice Points
Q: What is the Vancouver classification of periprosthetic femoral fractures?
A: Type A is trochanteric; B is around the stem and subdivided by stability/bone stock; C lies well below the stem. B1 usually supports ORIF, B2/B3 usually support revision/reconstruction, but host, infection, stem design and fracture morphology can justify exceptions.
Q: How do you assess stem stability in a Vancouver B periprosthetic fracture?
A: Compare prior radiographs for subsidence/migration, inspect osteolysis and cement/implant interfaces, understand the stem design and test directly when safely exposed. No single lucency width or “assume B2” shortcut replaces a prepared revision-level assessment.
Q: What is the treatment algorithm for Vancouver B1 periprosthetic fractures?
A: B1 means the stem is truly stable. Restore length, alignment and rotation with fracture-specific ORIF: select plate length/working length, screw corridors, locking attachments, cerclage, orthogonal fixation and strut augmentation according to morphology, implant obstruction and bone. Confirm stability and exclude infection; do not reduce the operation to a universal cable-plate recipe.
Q: What reconstruction options exist for Vancouver B3 fractures?
A: B3 combines a loose stem with deficient bone. Options include distal-fixation revision with structural/biological augmentation, impaction grafting in appropriate settings, allograft-prosthetic composite and proximal femoral replacement. Selection depends on reconstructible host bone, infection, abductor function, physiology and goals; cemented or cementless fixation is not decided by the Vancouver label alone.
Q: What are risk factors for periprosthetic hip fractures?
A: Patient factors: Osteoporosis, female sex, advancing age, rheumatoid arthritis, previous revision. Implant factors: Uncemented stems higher intraoperative risk, cemented stems higher postoperative risk (stress risers at cement tips). Technical factors: Aggressive reaming, eccentric stem placement, cortical perforation. Incidence increasing with aging THA population.
Exam Viva Scenarios
Practise clinical reasoning and management decisions out loud
“A patient with a THR falls and has a fracture around the mid-stem. X-rays show the stem is well-fixed with no lucency. How do you classify and manage?”
“An 82-year-old woman with a THR from 15 years ago falls. X-rays show a fracture around the stem with significant stem loosening and extensive osteolysis. There is minimal remaining cortical bone in the proximal femur. What is your classification and surgical plan?”
“You are fixing what you thought was a Vancouver B1 fracture with planned ORIF. During surgery, when you test the stem, you find it has some motion. What do you do?”
Vancouver Classification
- A: trochanteric; treat displacement, abductor function and stem relevance
- B: around stem; define stability and bone stock
- C: distal to stem; plan fixation around implant geometry and stress risers
Vancouver B
- B1: stable stem; usually fracture-specific ORIF
- B2: loose stem with usable bone; usually revision, selected ORIF exceptions
- B3: loose stem with deficient bone; revision plus reconstruction/replacement
Key Principle
- Integrate serial imaging, implant design and safe direct testing
- Exclude infection and map bone loss
- Prepare both fixation and revision strategies when uncertain
ORIF Technique
- Plate length and working length match morphology
- Use screws, locking attachments or cerclage according to safe corridors
- Add orthogonal fixation or strut only for a defined deficit
Evidence Base
Vancouver Classification (Duncan & Masri, 1995)
- Original description of the Vancouver classification system
- Stratifies fractures by location, stem stability, and bone stock
- Type B subdivided into B1 (stable), B2 (loose, good bone), B3 (loose, poor bone)
- Became the gold-standard framework guiding the treatment algorithm worldwide
Vancouver Reliability & Validity (Naqvi et al, 2012)
- Six observers reviewed radiographs of 45 patients on two occasions
- Interobserver agreement substantial (kappa 0.69 consultants, 0.61 trainees)
- Intraobserver kappa 0.74 to 0.90 (substantial)
- Type B subgroup (B1/B2/B3) agreement 81% (kappa 0.68) on radiographs alone
Unified Classification System Field Test (Van der Merwe, Haddad & Duncan, 2014)
- International panel of 10 experts and 10 trainees, two reading rounds
- Interobserver reliability substantial (kappa 0.74 experts, 0.77 pre-experts)
- Intraobserver reliability near-perfect (weighted kappa 0.88 to 0.90)
- UCS extends the Vancouver A-F system to any implant, bone, and joint
ORIF vs Revision for Stable-Stem B1/C (Laurer et al, 2011)
- 32 stable-stem fractures: 16 ORIF (plate) vs 16 revision arthroplasty
- Functional outcome (Timed Up and Go) similar between groups
- Surgery-related complications significantly higher after ORIF (10 vs 3, p=0.03)
- Authors warn misreading a B2 (loose) as B1 causes ORIF failure
Loose-Stem Burden: Swedish Hip Arthroplasty Register (Lindahl et al, 2005)
- 1049 postoperative periprosthetic femoral fractures (1979-2000)
- Majority of LATE periprosthetic fractures occurred around a LOOSE stem
- Implant-related factors significantly associated with fracture risk
- Historically poor outcomes: low survivorship, high complication rate
Mortality After Periprosthetic Femoral Fracture (Bhattacharyya et al, 2007)
- 106 surgically treated periprosthetic femoral fractures
- One-year mortality 11% - similar to native hip fracture, far above primary THA (2.9%)
- Surgery delayed over two days associated with higher one-year mortality (p=0.0007)
- For type B: revision arthroplasty 12% vs ORIF 33% one-year mortality (p=0.03)
Bone Augmentation for B3 (Tsiridis et al, 2007)
- Narrative review of bone augmentation strategies for deficient proximal femur
- Allograft is the workhorse: morsellised (impaction) or structural (strut / whole proximal femur)
- Strut onlay grafts augment cortical bone; proximal femoral replacement substitutes for it
- Risks: immune reaction, disease transmission, delayed cortical revascularisation