Extra-articular Distal-Third Shaft | Radial Nerve at the Septum | Anterior Plating
Surgical Imaging
Indications & Rationale
Open reduction and internal fixation of extra-articular distal-third humeral shaft fractures by anterior/anterolateral plating; non-union or malunion of the distal shaft; excision/biopsy of distal anterior diaphyseal lesions; situations where the radial nerve needs controlled anterior management.
The distal third is the transition zone where the radial nerve crosses to the anterior compartment. An anterolateral exposure allows the nerve to be found, traced and protected anteriorly while an anterior/anterolateral plate is applied — avoiding the prone/lateral positioning of the posterior approach.
Provides less wide exposure than the posterior approach for very distal or comminuted patterns; intra-articular distal humeral fractures are NOT an indication (these need a posterior, olecranon-osteotomy or paratricipital exposure of the articular surface).
Posterior approach (widest exposure, direct radial nerve visualisation); combined anterolateral + lateral bimodal approach (Lee 2013) for nerve protection across the distal shaft; MIPO through anterior windows for selected patterns.
Surgical Anatomy
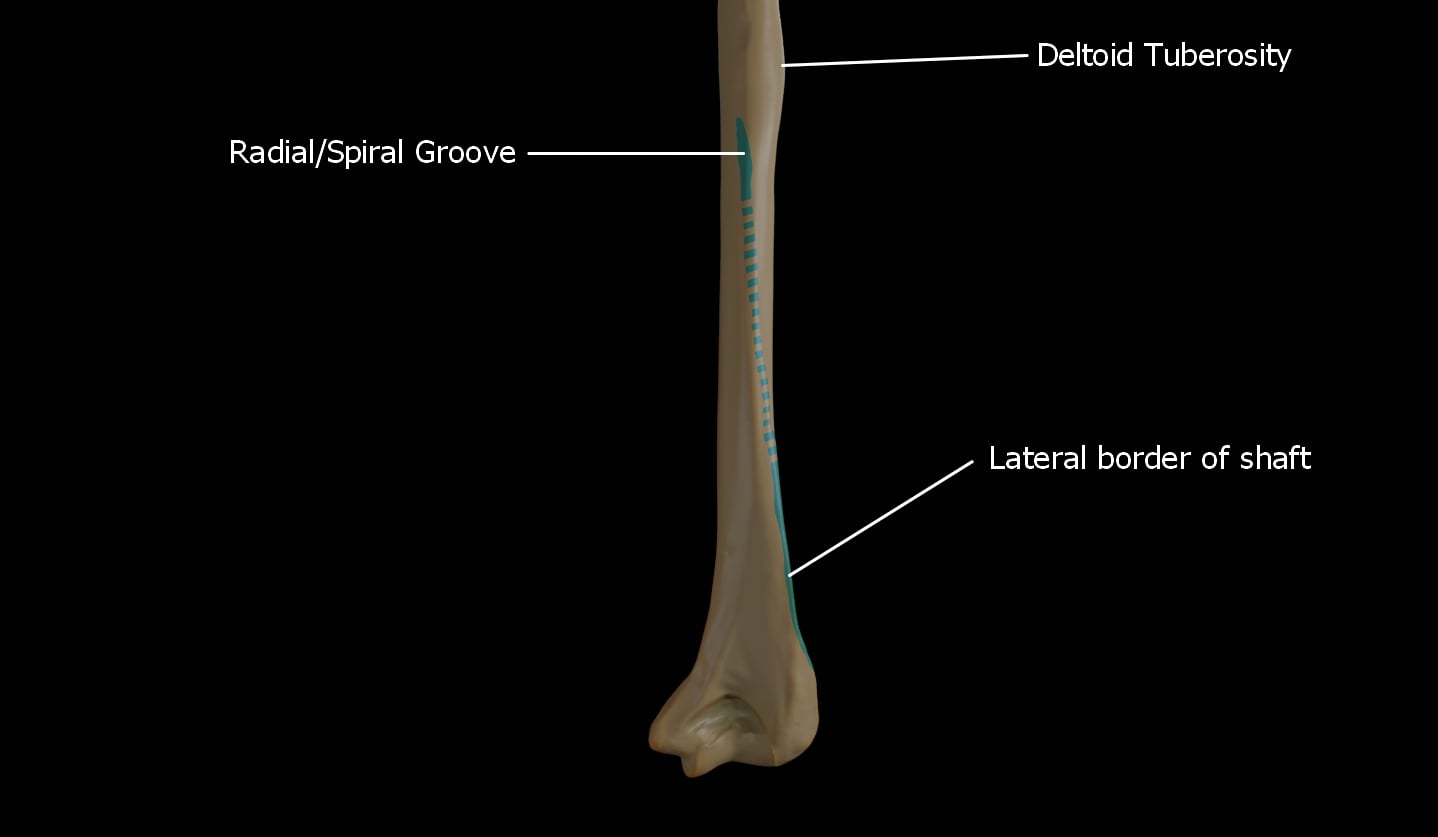
- The radial nerve leaves the posterior compartment by piercing the lateral intermuscular septum on average ~10 cm proximal to the lateral epicondyle.
- Anterior to the septum it lies in the groove between brachialis (medial) and brachioradialis (lateral), accompanied by branches to brachioradialis and ECRL.
- Near the radiocapitellar joint / lateral epicondyle it divides into:
- Posterior interosseous nerve (PIN) — passes between the two heads of supinator (motor to the extensors); at risk with distal dissection and retraction.
- Superficial radial nerve — runs distally deep to brachioradialis (sensory to the dorsoradial hand).
- Superficial: biceps brachii (retracted medially with the musculocutaneous nerve) and, distally, the mobile wad/brachioradialis laterally.
- Deep: brachialis covering the anterior distal cortex (split or retracted medially); brachioradialis retracted laterally to open the interval housing the radial nerve.
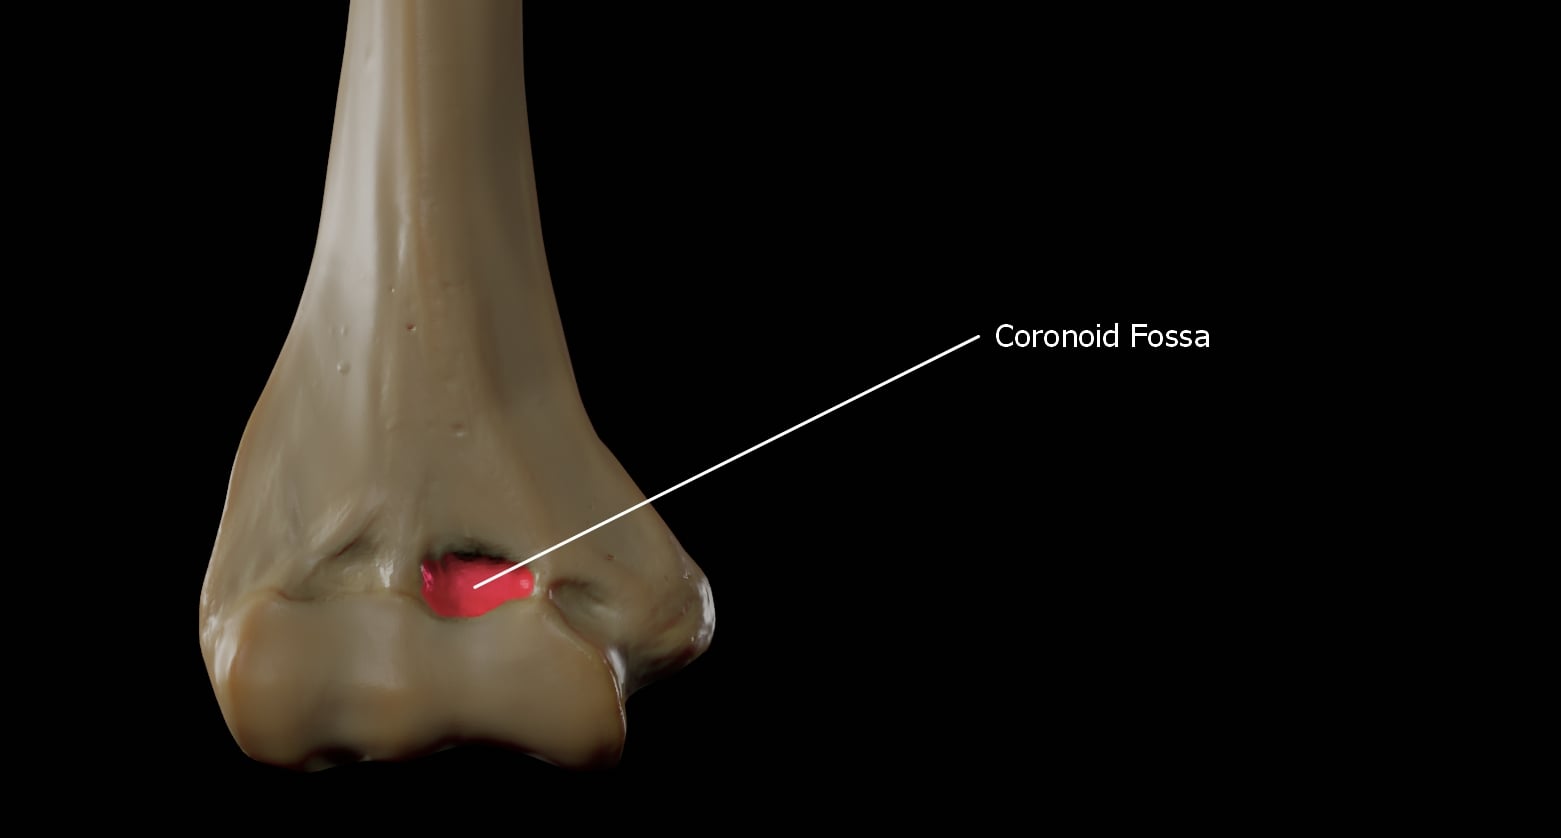
- Bone: the anterior and anterolateral surfaces of the distal humeral metadiaphysis are exposed for plate application; the supracondylar ridges define the distal limit of safe extra-articular fixation.
The Approach — Step by Step
- Supine, arm on a radiolucent arm board (or across the chest); tourniquet high on the arm if used. Image intensifier available.
- Landmarks: lateral border of biceps/brachialis proximally and the lateral epicondyle distally; the incision follows the anterolateral aspect of the distal arm, curving as needed toward the lateral epicondyle.
Dangers & How to Avoid Them
Structures at risk
In this approach the radial nerve is IN the field and must be POSITIVELY IDENTIFIED — there is no internervous plane to hide behind. Find the nerve where it pierces the lateral intermuscular septum (~10 cm above the lateral epicondyle), proximal to the pathology, before any deep dissection or fixation.
Anterolateral vs Posterior vs Bimodal — Distal Shaft
Approach selection for extra-articular distal-third shaft fractures
Outcomes & Evidence
Combined anterolateral + lateral (bimodal) approach protects the radial nerve
Distal humerus shaft: lateral/anterolateral vs posterior approach — comparable outcomes
Based on articles retrieved from PubMed: Lee et al. (DOI) and Saracco et al. (DOI). The radial nerve's course (piercing the lateral intermuscular septum ~10 cm above the lateral epicondyle, division into PIN and superficial radial nerve) reflects standard, well-established surgical-anatomy teaching.
Viva Scenarios
Practise clinical reasoning and management decisions out loud
“You are exposing an extra-articular distal-third humeral shaft fracture anterolaterally. The examiner asks: 'Where is the radial nerve and how do you keep it safe?'”
“The examiner asks whether the anterolateral or posterior approach gives better outcomes for an extra-articular distal-third shaft fracture.”
Viva & Exam Focus
SPLITDistal radial nerve danger
Hook:In the distal humerus the radial nerve has crossed to the front — you must SPLIT your attention to it: find it at the septum, follow it past the PIN.
- The radial nerve IS in the field here (unlike the mid-shaft anterolateral approach) — positively identify it.
- ~10 cm above the lateral epicondyle = where it pierces the lateral intermuscular septum.
- This approach is for EXTRA-ARTICULAR distal-shaft fractures, not intra-articular distal humeral fractures.