Technique, normal anatomy and pathological patterns for the orthopaedic exam
Neurapraxia: Conduction block, nerve intact
Axonotmesis: Axon disrupted, endoneurium intact
Neurotmesis: Complete nerve disruption
Key: MRI can show continuity but not differentiate axonotmesis from neurotmesis reliably
- Normal nerve: intermediate T1, slightly high T2, fascicular pattern
- Pathology: nerve enlargement, T2 hyperintensity, loss of fascicular pattern
- 3T MRI preferred for nerve imaging (higher SNR)
- PD or T2 fat-sat sequences best for nerve visualisation
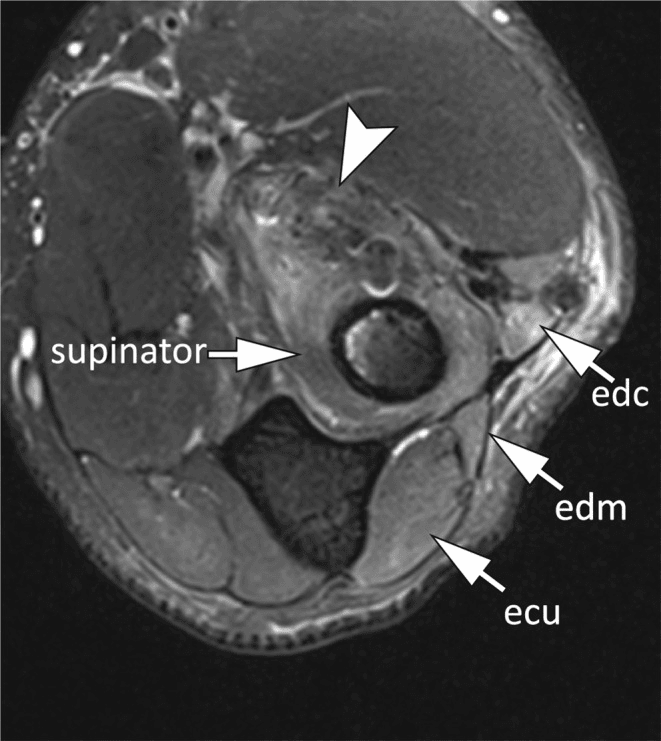
- Denervation oedema in muscle indicates upstream nerve injury
- “Carpal tunnel: median nerve enlarged at the pisiform (18.8 vs 12.1 mm² in controls) — no validated MRI cut-off; the 10mm² figure is an ultrasound threshold
- “Cubital tunnel: ulnar nerve enlargement proximal to tunnel
- “Brachial plexus: roots, trunks, divisions, cords, branches
- “Nerve tumour: fusiform swelling, target or fascicular sign
- “Muscle denervation: T2 high acutely, fatty replacement chronically
Overview & Imaging Principles
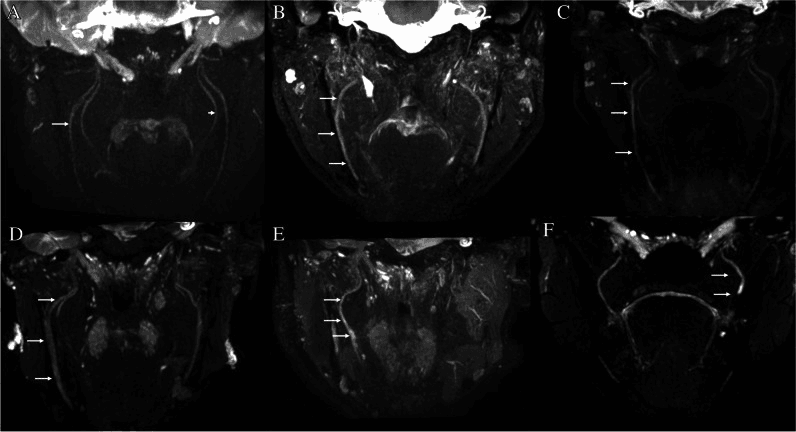
What it adds. MR neurography is high-resolution, fat-suppressed MRI optimised to display peripheral nerves. It detects pathology that electrodiagnostics localise but cannot anatomically map, and it complements, rather than replaces, nerve conduction studies and high-resolution ultrasound.
Where it earns its place. It excels at deep or proximal nerves and at the brachial and lumbosacral plexus, characterises mass lesions, and demonstrates secondary muscle denervation. Carpal and cubital tunnel are its common clinical applications, but in the typical case clinical assessment and nerve conduction studies come first, and MR neurography is reserved for atypical or secondary causes.
- Best initial test
- Clinical + nerve conduction studies
- Role of MR neurography
- Reserved for atypical or secondary causes
- Best initial test
- High-resolution ultrasound
- Role of MR neurography
- Problem-solving, deep extension
- Best initial test
- MR neurography
- Role of MR neurography
- First-line imaging
- Best initial test
- MRI with contrast
- Role of MR neurography
- Characterisation and surgical planning
- Best initial test
- MRI muscle denervation map
- Role of MR neurography
- Identifies level and chronicity
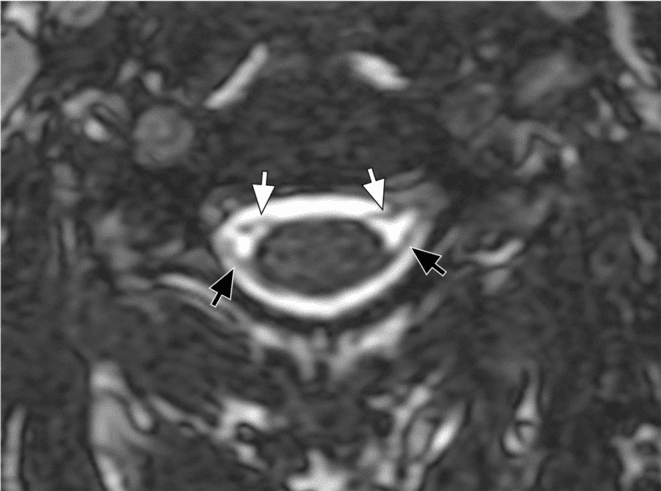
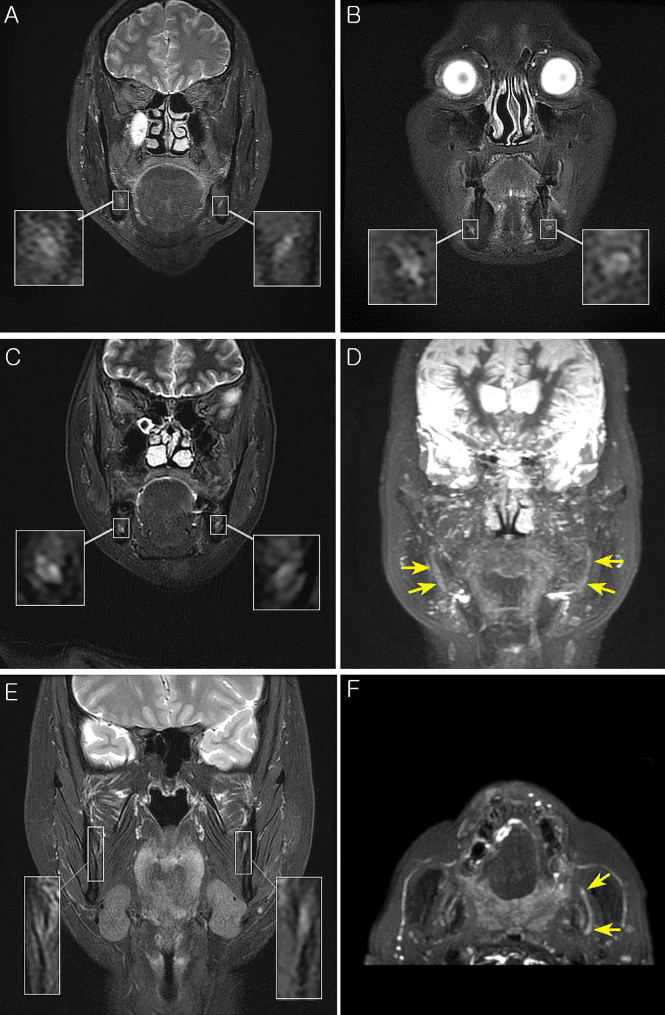
Key Findings: Pathological Nerve Patterns
Compression. The signs of entrapment are read at the tunnel and just above it.
- Description
- Increased cross-sectional area
- Significance
- Proximal to compression site
- Description
- Increased signal (brighter than normal)
- Significance
- Oedema, inflammation
- Description
- Abrupt narrowing at compression point
- Significance
- Indicates entrapment location
- Description
- Flattening at compression site
- Significance
- External compression
- Description
- Homogeneous signal
- Significance
- Fibrosis, chronic compression
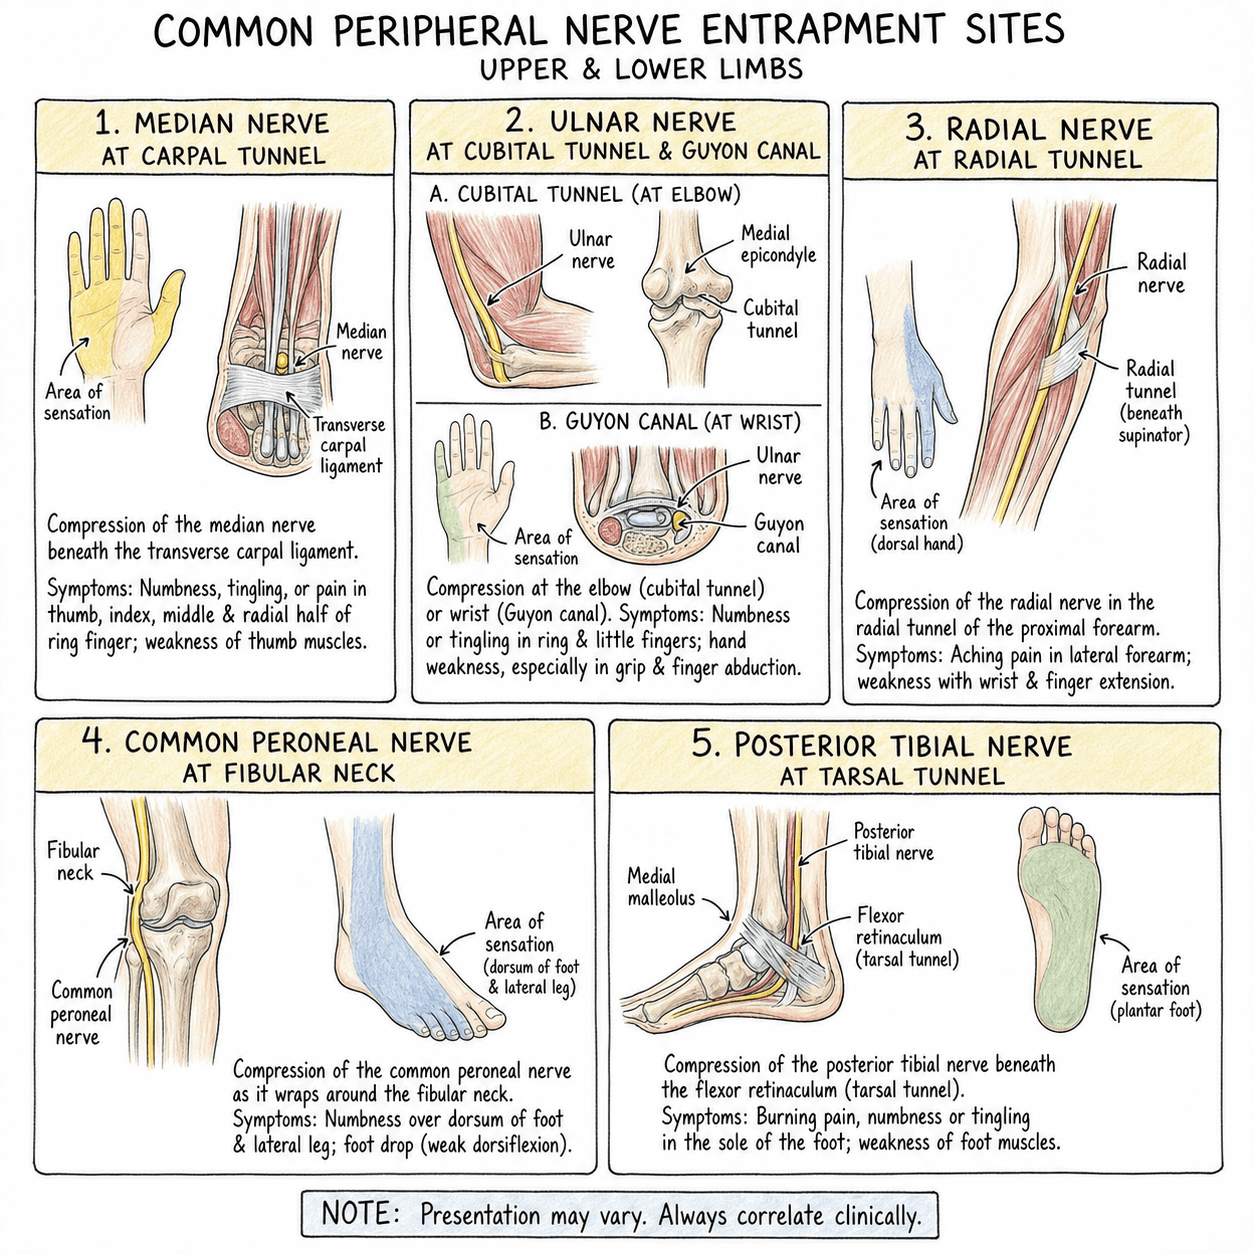
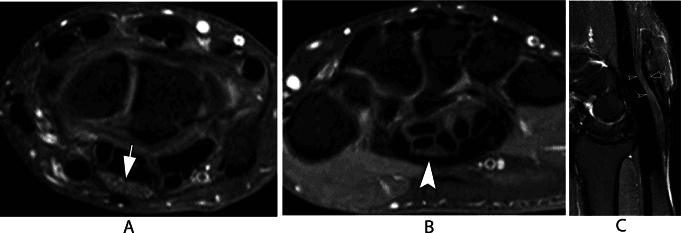
Carpal tunnel. Median nerve cross-sectional area at the pisiform is the most discriminating measurement, but there is no validated MRI cut-off. In the study cited on this page the mean was 18.8 mm² in carpal tunnel syndrome against 12.1 mm² in controls, so the familiar 10 mm² figure, which comes from ultrasound, would call the average normal wrist abnormal.
Reading the wrist. Compare with the other side, and read the area alongside the qualitative signs:
- Palmar bowing of the flexor retinaculum
- Nerve flattening within the tunnel
- T2 hyperintensity
- Proximal nerve enlargement
- Sometimes, thenar denervation
Cubital tunnel. The ulnar nerve enlarges proximal to the cubital tunnel, behind the medial epicondyle, and may sublux over the epicondyle with flexion. T2 hyperintensity indicates inflammation, and there may be denervation of FCU or of the intrinsic muscles.
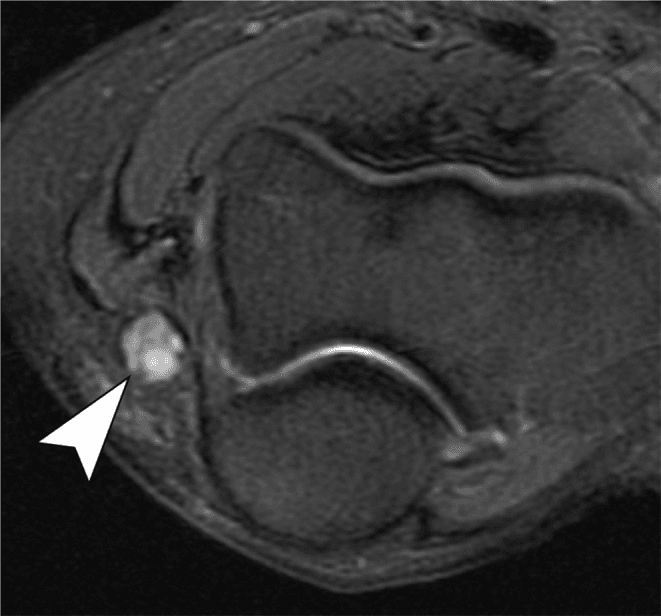
Other tunnels. The same reading applies wherever a nerve passes a known fibro-osseous tunnel: signal increase and calibre change at the tunnel, supported by denervation in the muscles the nerve supplies.
Systematic Approach: Normal Nerve Appearance
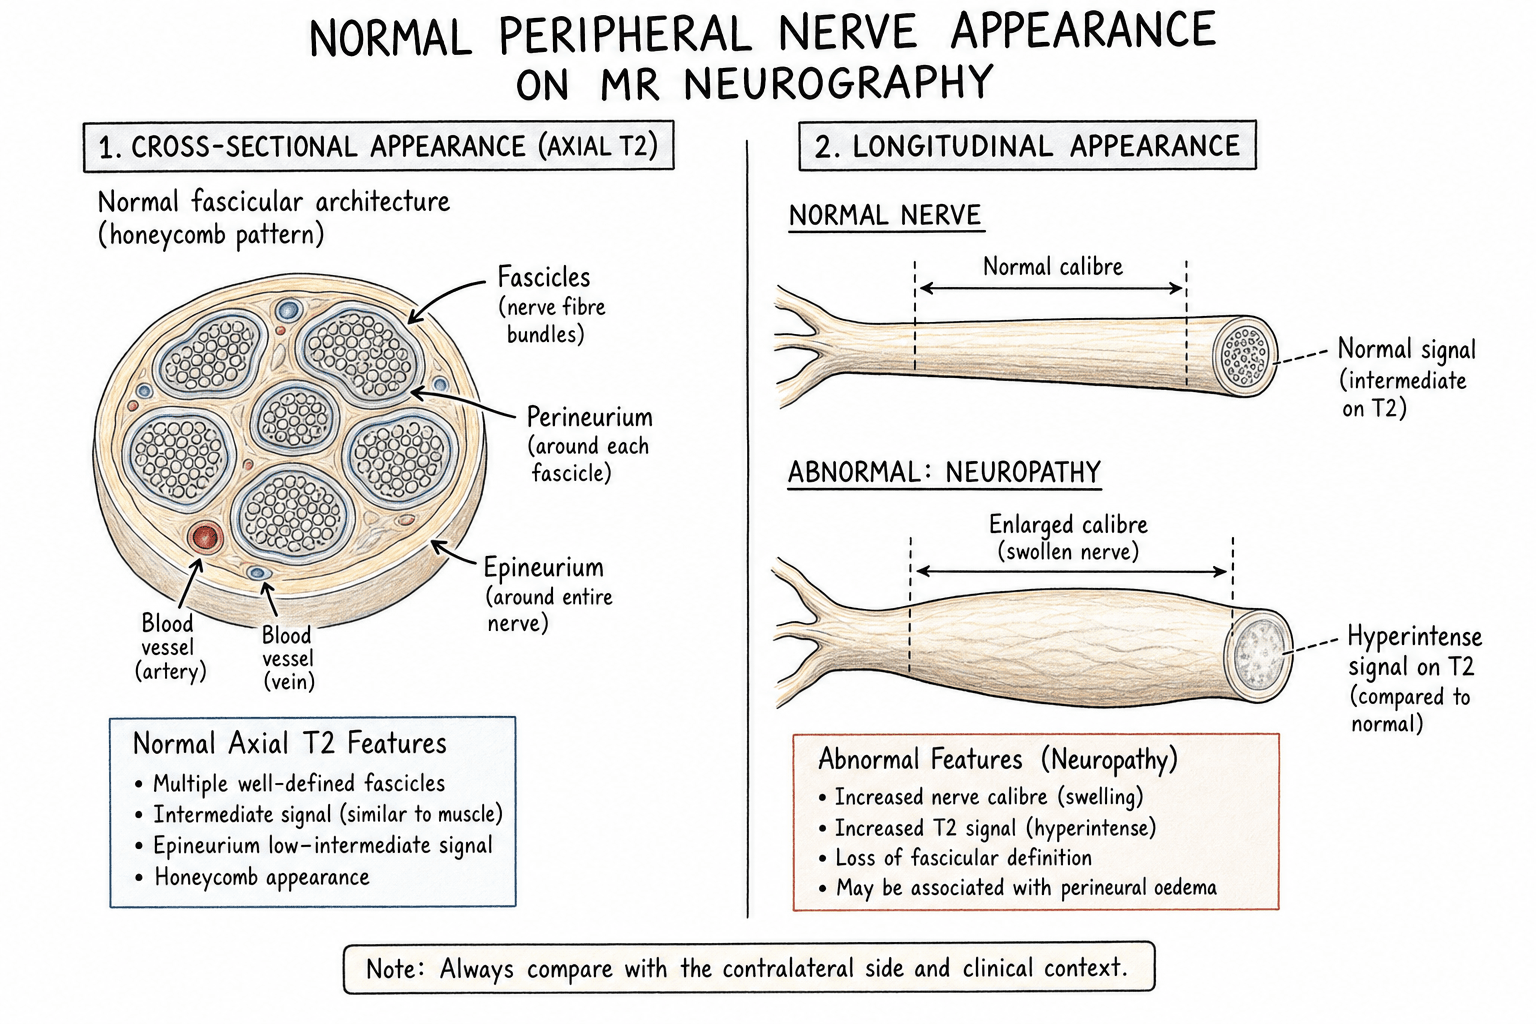
The normal nerve. Six features describe the normal appearance, each with its significance.
- Appearance
- Intermediate (isointense to muscle)
- Significance
- Anatomic localisation
- Appearance
- Mildly hyperintense to muscle
- Significance
- Not as bright as fluid
- Appearance
- Honeycomb appearance on axial
- Significance
- Intact nerve architecture
- Appearance
- Consistent along course
- Significance
- Enlargement indicates pathology
- Appearance
- Minimal or none with Gd
- Significance
- Enhancement suggests pathology
- Appearance
- Smooth, no deviation
- Significance
- Mass effect causes displacement
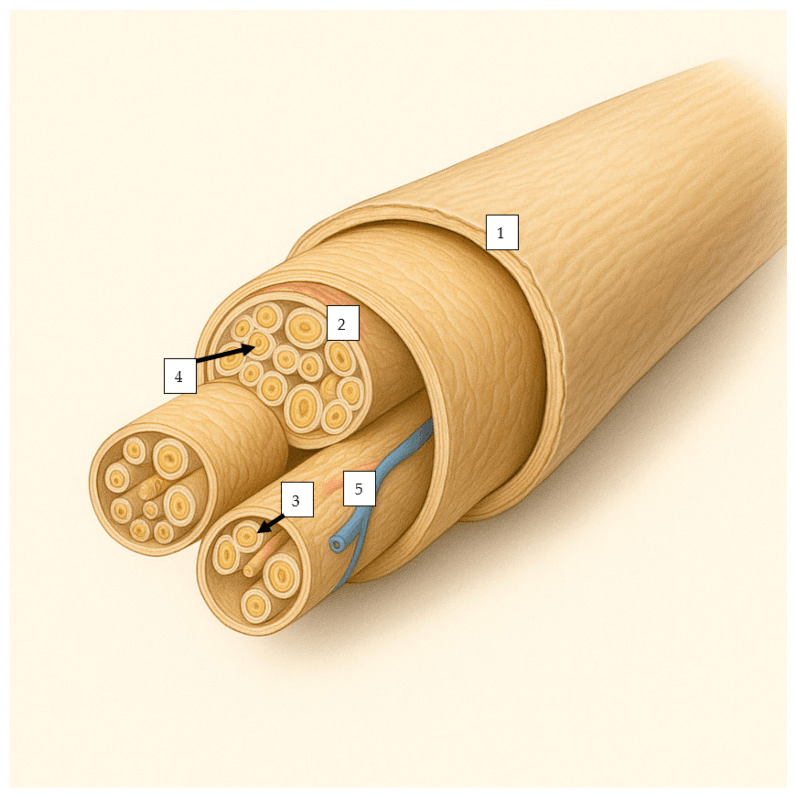
The fascicular pattern. On high-resolution axial images it appears as multiple round or oval low-signal dots (the perineurium) surrounding intermediate-signal fascicles. This honeycomb pattern is lost in nerve injury, tumour and inflammation.
Specific Nerve Imaging
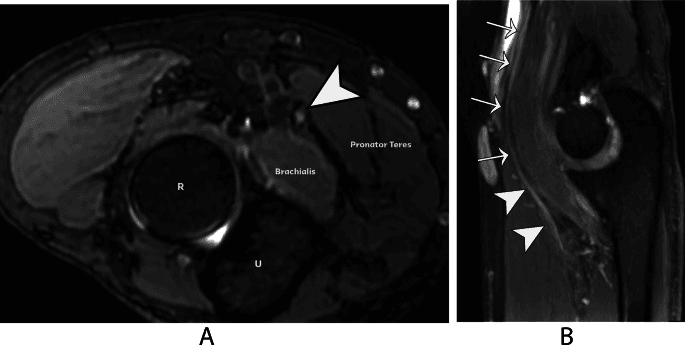
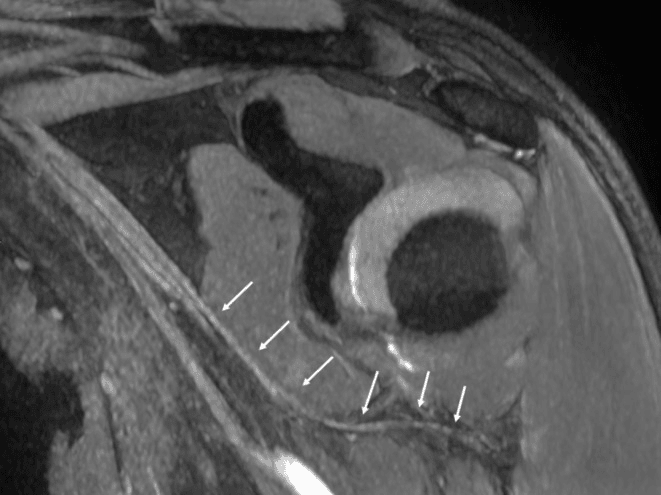
Brachial plexus. The plexus is assessed part by part, from the roots at the foramina to the branches in the axilla and arm, each with its own pathologies.
- Location
- Exit neural foramina
- Key Pathologies
- Avulsion (pseudomeningocele), stretch
- Location
- Supraclavicular
- Key Pathologies
- Trauma, tumour, TOS
- Location
- Behind clavicle
- Key Pathologies
- Less commonly seen
- Location
- Infraclavicular
- Key Pathologies
- Tumour, aneurysm compression
- Location
- Axilla, arm
- Key Pathologies
- Specific nerve injuries
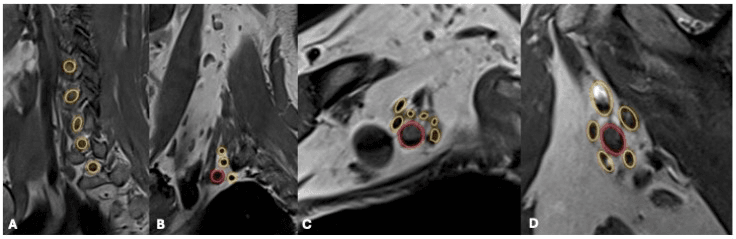
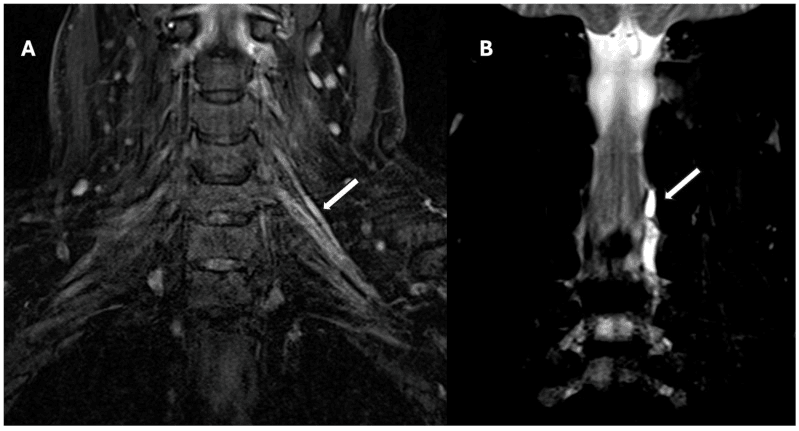
Root avulsion. MRI can assess traumatic root avulsion, which has a poor prognosis without grafting. The signs:
- Pseudomeningocele, a CSF collection at the root level
- Absent nerve root on T2 myelography
- Denervation of the paraspinal muscles, specific for a preganglionic injury
Sciatic nerve. A large nerve, 1-2cm in diameter, it arises from the lumbosacral plexus and divides into tibial and common peroneal at the knee. Its common pathologies are piriformis syndrome, in which the nerve is enlarged where it passes piriformis, trauma and tumour. Always trace it proximally to exclude proximal pathology.
Grading Nerve Injury (Seddon / Sunderland) and What MRI Can Add
Why the grade matters. The grade of a nerve injury drives prognosis and the decision to wait or operate. MRI shows continuity but cannot reliably separate axonotmesis from neurotmesis. The full classification and the biology of degeneration and regeneration are developed in the nerve-injury-regeneration topic; the focus here is the imaging correlate.
- Significance
- Intact vs disrupted
- Prognosis
- Neurotmesis if disrupted
- Significance
- Fusiform enlargement at injury site
- Prognosis
- May need excision/grafting
- Significance
- Terminal bulb at cut end
- Prognosis
- Indicates discontinuity
- Significance
- Low T2 signal surrounding nerve
- Prognosis
- May cause ongoing compression
- Significance
- High T2 in supplied muscles
- Prognosis
- Indicates functional deficit
- Sunderland
- Grade I
- Lesion
- Focal myelin block, axon intact
- Recovery
- Full, days to weeks
- MRI / imaging correlate
- Often normal or only mild focal T2 signal; nerve continuous; little or no muscle denervation
- Sunderland
- Grades II to IV
- Lesion
- Axon disrupted, connective sheaths progressively involved (II endoneurium intact to IV only epineurium intact)
- Recovery
- Variable - good in II, poor in IV; axon regrows about 1 mm/day
- MRI / imaging correlate
- Nerve continuous but enlarged and T2-hyperintense with muscle denervation; MRI cannot reliably separate II from III from IV
- Sunderland
- Grade V
- Lesion
- Complete transection, all layers
- Recovery
- None without surgery
- MRI / imaging correlate
- Discontinuity, gap, stump / terminal neuroma; muscle denervation
Why imaging cannot replace time. MRI reliably shows nerve continuity, calibre, signal and secondary muscle denervation. Early on, though, it cannot distinguish a recovering axonotmesis from a neurotmesis, because both show a swollen, T2-bright, denervating nerve.
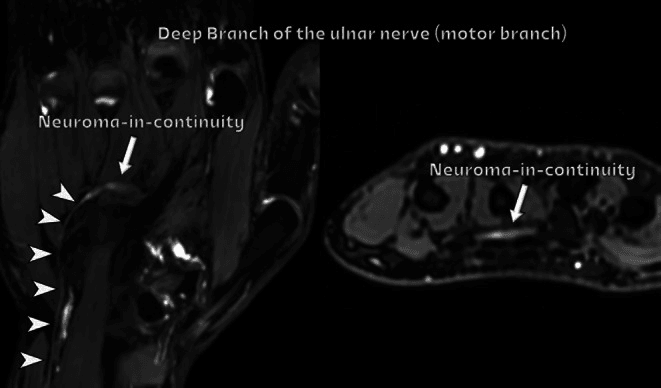
The neuroma-in-continuity. Sunderland grades II to IV, and the mixed grade VI of Mackinnon, all keep the nerve in continuity. A neuroma-in-continuity may need excision or grafting, but its presence on MRI does not by itself indicate surgery.
What decides. Serial clinical examination, electrodiagnostic evidence of re-innervation and the passage of time (no recovery by the expected re-innervation distance, advancing Tinel sign) remain essential. Intra-operative nerve action potentials across a neuroma-in-continuity are the definitive test of whether to resect and graft.
Muscle Denervation
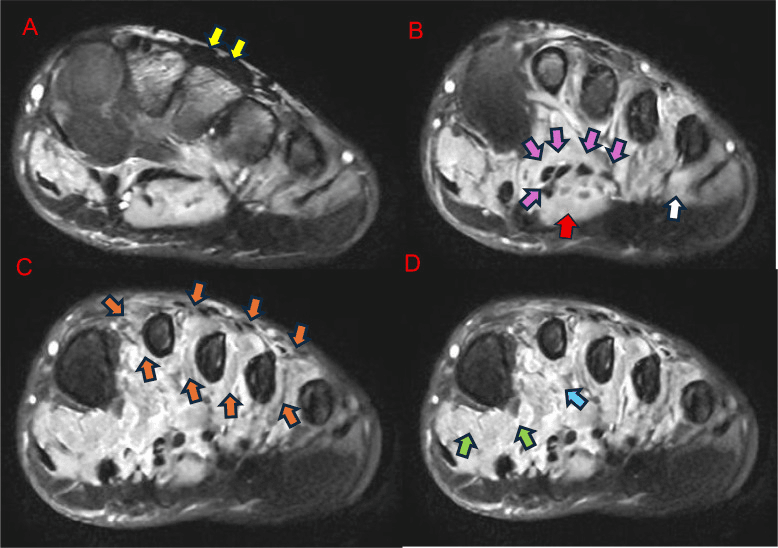
The muscle points to the nerve. If you see muscle oedema in a specific nerve distribution, look for the nerve pathology upstream.
Oedema, then fat. Oedema-like high T2 signal comes first, fatty replacement with atrophy later, and time determines reversibility. The early changes are potentially reversible; chronic denervation with fatty infiltration indicates poor recovery potential.
- Timeframe
- Less than 1 month
- T1 Signal
- Normal
- T2/STIR Signal
- High (oedema)
- Reversibility
- Fully reversible
- Timeframe
- 1-6 months
- T1 Signal
- Normal to slightly high
- T2/STIR Signal
- High
- Reversibility
- Largely reversible
- Timeframe
- Greater than 6 months
- T1 Signal
- High (fatty)
- T2/STIR Signal
- Variable
- Reversibility
- Irreversible fatty infiltration
Differential Diagnosis on Nerve MRI
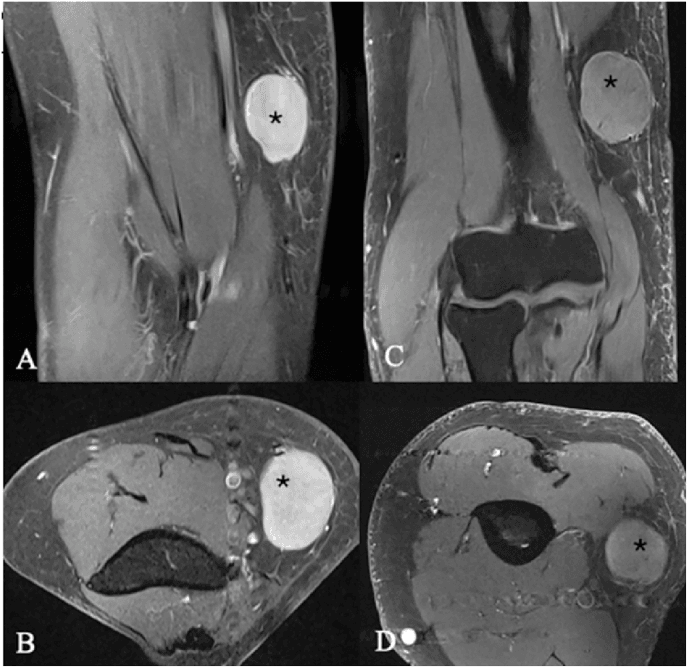
Nerve sheath tumours. The target sign is central low T2 signal (fibrous tissue) with peripheral high T2 signal (myxoid tissue). It is seen in both schwannoma and neurofibroma, and is classic but not specific for benign nature. Perineurioma, which is rare and benign, is fusiform, runs along the nerve and is T2 hyperintense.
- Key MRI Pattern
- Proximal enlargement, T2 hyperintensity, calibre change at tunnel
- Discriminating Feature
- Abnormality localises to a known fibro-osseous tunnel
- Pitfall
- Mild T2 signal can be normal at tunnels (magic-angle, partial volume)
- Key MRI Pattern
- Discontinuity, neuroma-in-continuity, stump neuroma
- Discriminating Feature
- History of trauma plus focal fusiform mass at injury level
- Pitfall
- Perineurial fibrosis may mimic enlargement
- Key MRI Pattern
- Fusiform, eccentric to nerve, split-fat and target signs
- Discriminating Feature
- Separable from parent fascicles; nerve passes at edge
- Pitfall
- Cystic/ancient change can look aggressive
- Key MRI Pattern
- Fusiform, central within nerve, target sign
- Discriminating Feature
- Nerve enters and exits centrally; cannot be separated
- Pitfall
- Plexiform type in NF1 may harbour MPNST
- Key MRI Pattern
- Over 5cm, ill-defined or irregular, heterogeneous, perilesional oedema, loss of split-fat
- Discriminating Feature
- Absent split-fat sign, low ADC on DWI, rapid growth, NF1
- Pitfall
- Target sign does NOT exclude malignancy
- Key MRI Pattern
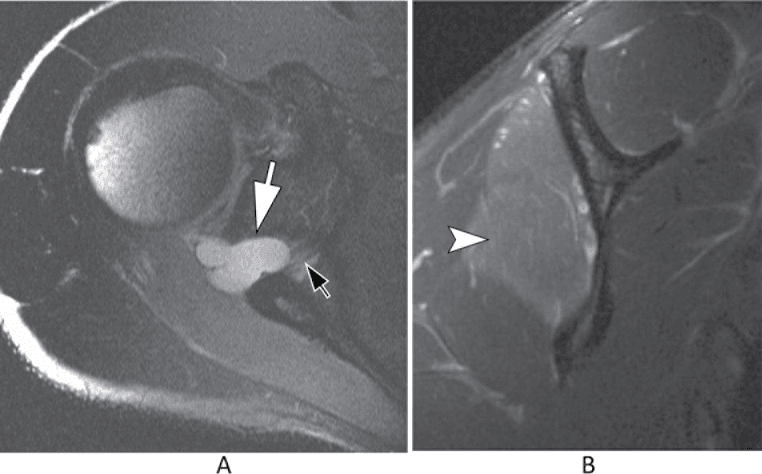
- Cystic T2-bright tubular lesion tracking along nerve
- Discriminating Feature
- Connection to adjacent joint (e.g. superior tibiofibular)
- Pitfall
- Mistaken for solid tumour
- Key MRI Pattern
- Coaxial-cable / spaghetti appearance, fat between thickened fascicles
- Discriminating Feature
- Macroscopic fat following fat signal on all sequences
- Pitfall
- May coexist with macrodactyly
- Key MRI Pattern
- Diffuse symmetric multi-nerve thickening and T2 signal
- Discriminating Feature
- Bilateral, non-focal, no tunnel localisation
- Pitfall
- Misread as multifocal entrapment
The split-fat sign. A rim of fat partly surrounds a fusiform intraneural mass, reflecting the neurovascular bundle's fat being displaced rather than destroyed. Its presence favours a benign nerve sheath tumour; its absence is one of the most useful pointers to MPNST.
SCALE-TReading the Abnormal Nerve
Hook:Signal change alone is non-specific; combine size, calibre, architecture and muscle denervation before calling pathology.
Magic-Angle Artefact: The Great Nerve-Signal Pitfall
Why it matters. Mild nerve T2 signal can be normal, and the magic-angle effect is the single commonest reason a normal nerve is over-called as neuropathic. The general MRI physics is developed in the mri-imaging-principles topic; this is the nerve-specific pitfall.
The physics. Highly ordered collagen, in nerve fascicles, tendons and ligaments, normally has a very short T2 because of dipolar interactions between water protons, so these structures are dark on most sequences. When the fibres lie at about 55 degrees to the main magnetic field (B0) those interactions are minimised, T2 lengthens, and the structure becomes artefactually bright on short-echo-time sequences (T1, proton density, PD fat-sat, short-TE gradient echo).
Where it catches you. A nerve curving around a tunnel or angling through the brachial plexus can pass through this orientation and light up, mimicking oedema.
- Magic-angle artefact
- Bright on short-TE sequences; fades as TE lengthens
- True neuropathy
- Bright on T2 / STIR and persists at long TE
- Magic-angle artefact
- Only where the nerve lies near 55 degrees to B0 (curved/oblique segments)
- True neuropathy
- At the site of pathology (tunnel, mass, injury), any orientation
- Magic-angle artefact
- Normal
- True neuropathy
- Often enlarged with a calibre change
- Magic-angle artefact
- Preserved
- True neuropathy
- Often lost
- Magic-angle artefact
- Absent
- True neuropathy
- May be present
How not to be fooled. Suspect magic angle rather than disease when a nerve is bright only on short-echo-time sequences, only where it bends towards 55 degrees to the main field, and is of normal calibre with preserved fascicles and no muscle denervation. Confirm on a long-echo-time sequence, where the artefact fades and true oedema persists, and against the contralateral side.
Guidelines, Registries & Global Practice
- Position on MRI / Neurography
- Routine imaging not required to diagnose idiopathic CTS; electrodiagnostics support diagnosis
- Practical Implication
- Reserve MRI for atypical or secondary causes
- Position on MRI / Neurography
- MR neurography / high-resolution US usually appropriate for focal neuropathy and plexopathy
- Practical Implication
- Modality choice guided by site and local expertise
- Position on MRI / Neurography
- Clinical and electrodiagnostic diagnosis first; imaging for atypical features or masses
- Practical Implication
- MRI targeted, not screening
- Position on MRI / Neurography
- MR neurography and US complementary; 3T and dedicated coils recommended where available
- Practical Implication
- Protocol and expertise dependent
- Position on MRI / Neurography
- Endorses high-resolution US and MR neurography with standardised nerve protocols
- Practical Implication
- Drives reporting consistency
Related pages: Nerve Root vs Peripheral Nerve for localising the lesion before requesting the scan, and Nerve Repairs for what the imaging findings commit you to. For the entrapments imaged most often see Carpal Tunnel, Cubital Tunnel Syndrome, Tarsal Tunnel Syndrome, Meralgia Paraesthetica and Morton's Neuroma, where MR neurography and high-resolution ultrasound are complementary. For the masses, Schwannoma, Neurofibroma and Malignant Peripheral Nerve Sheath Tumour — remembering that no imaging sign reliably separates benign from malignant. Plexus anatomy is in Brachial Plexus Anatomy and Lumbosacral Plexus Anatomy, with Adult Brachial Plexus Injury for the traumatic case.
Controversies & Areas of Uncertainty
Ultrasound, MRI or nerve conduction studies? There is no consensus first-line imaging test for entrapment. High-resolution ultrasound is cheaper, dynamic and operator-available; MR neurography offers deep and proximal coverage (plexus, sciatic) and muscle denervation mapping. Reported diagnostic accuracy largely reflects local expertise and scanner availability rather than an inherent superiority of one modality, and electrodiagnostics remain the functional reference standard.
Is routine MRI needed in carpal tunnel syndrome? Most guidelines reserve MRI for atypical presentations, revision surgery, or a suspected secondary or structural cause such as a mass, an anomalous muscle, a persistent median artery or a bifid nerve. Cross-sectional-area thresholds vary by the level measured and overlap with controls, so MRI is not recommended to confirm routine idiopathic carpal tunnel syndrome.
Quantitative neurography. Fractional anisotropy and apparent diffusion coefficient from diffusion tensor imaging, and quantitative T2 mapping, are promising biomarkers of nerve injury and recovery but remain largely research tools. Lack of standardised acquisition, normative values and reproducibility across vendors limits routine clinical use.
What nerve T2 signal means. Mild fascicular T2 hyperintensity occurs in asymptomatic volunteers and from the magic-angle effect, so signal change alone is non-specific. Interpret it alongside calibre change, fascicular architecture, muscle denervation and the clinical and electrodiagnostic picture.
Clinical Imaging Technique
Seeing the nerve. Nerves are best visualised on fat-suppressed T2 or PD sequences, where they appear slightly hyperintense against the suppressed fat. On T1 the nerve is intermediate, which gives the anatomic localisation. High-resolution imaging should show the fascicular pattern, and the protocol is built to deliver that resolution.
- Recommendation
- 3T preferred over 1.5T
- Rationale
- Higher SNR for small structures
- Recommendation
- Dedicated surface coil
- Rationale
- Maximises signal-to-noise
- Recommendation
- Less than 3mm
- Rationale
- Resolves fascicular detail
- Recommendation
- Less than 1mm
- Rationale
- Visualises nerve architecture
- Recommendation
- PD fat-sat, T2 fat-sat, T1
- Rationale
- Nerve-fluid contrast
- Recommendation
- Axial perpendicular to nerve + along nerve
- Rationale
- Cross-section and longitudinal
Clinical Decision Scenarios
Practise clinical reasoning and management decisions out loud
“A 45-year-old presents with hand numbness and thenar weakness. Nerve conduction studies confirm carpal tunnel syndrome. The hand surgeon requests MRI.”
“A patient presents after a motorbike accident with a flail arm. Clinical examination suggests brachial plexus injury. What would you expect on MRI?”
“A 30-year-old presents with a slowly enlarging painless mass in the forearm. Ultrasound shows a fusiform mass along the course of a nerve.”
Normal Nerve Appearance
- T1: Intermediate (like muscle)
- T2: Mildly hyperintense to muscle
- Fascicular pattern (honeycomb)
- Size consistent along course
Compression Signs
- Nerve enlargement proximal to compression
- T2 hyperintensity (oedema)
- Calibre change at compression point
- Loss of fascicular pattern
Carpal Tunnel Criteria
- Median nerve enlarged at pisiform (18.8 vs 12.1 mm²); no validated MRI cut-off
- Palmar bowing of retinaculum
- Nerve flattening within tunnel
- Thenar denervation (late)
Denervation Pattern
- Acute: High T2, normal T1 (oedema)
- Chronic: High T1 (fatty infiltration)
- Distribution follows nerve supply
- Identifies level of injury
Evidence
Median nerve cross-sectional area at the pisiform is enlarged in carpal tunnel syndrome
- Retrospective comparison of 164 wrists: 67 with clinically and electrodiagnostically confirmed CTS versus 97 controls.
- Mean median nerve cross-sectional area at the pisiform level was 18.8 mm² in CTS versus 12.1 mm² in controls (p less than 0.05).
- Cross-sectional area at the hook of hamate did not differ significantly between groups.
3T MRI nerve cross-sectional area correlates with electrodiagnostic severity in CTS
- 70 wrists of 35 patients with unilateral idiopathic CTS imaged at 3T with nerve conduction studies.
- Median nerve cross-sectional area was greatest at the scaphoid body level and positively correlated with distal motor latency.
- Cross-sectional area at the distal radioulnar joint and hamate hook did not correlate with severity.